Single Sign On (SSO)
SAML SSO in Amberflo
Amberflo supports Single Sign-On (SSO) via SAML to enhance security and simplify user access for corporate accounts. This feature allows IT administrators to manage employee access centrally and eliminates the need for separate Amberflo credentials.
How It Works
Once SSO is enabled:
- Users can log in using their corporate identity.
- On the login page, they should select Continue with SSO at the bottom of the Email/Password login form.
- On the SSO sign-in screen, users enter their corporate email address and click Sign In to authenticate through their identity provider.
This setup ensures secure, passwordless access to Amberflo for your organization’s team members.
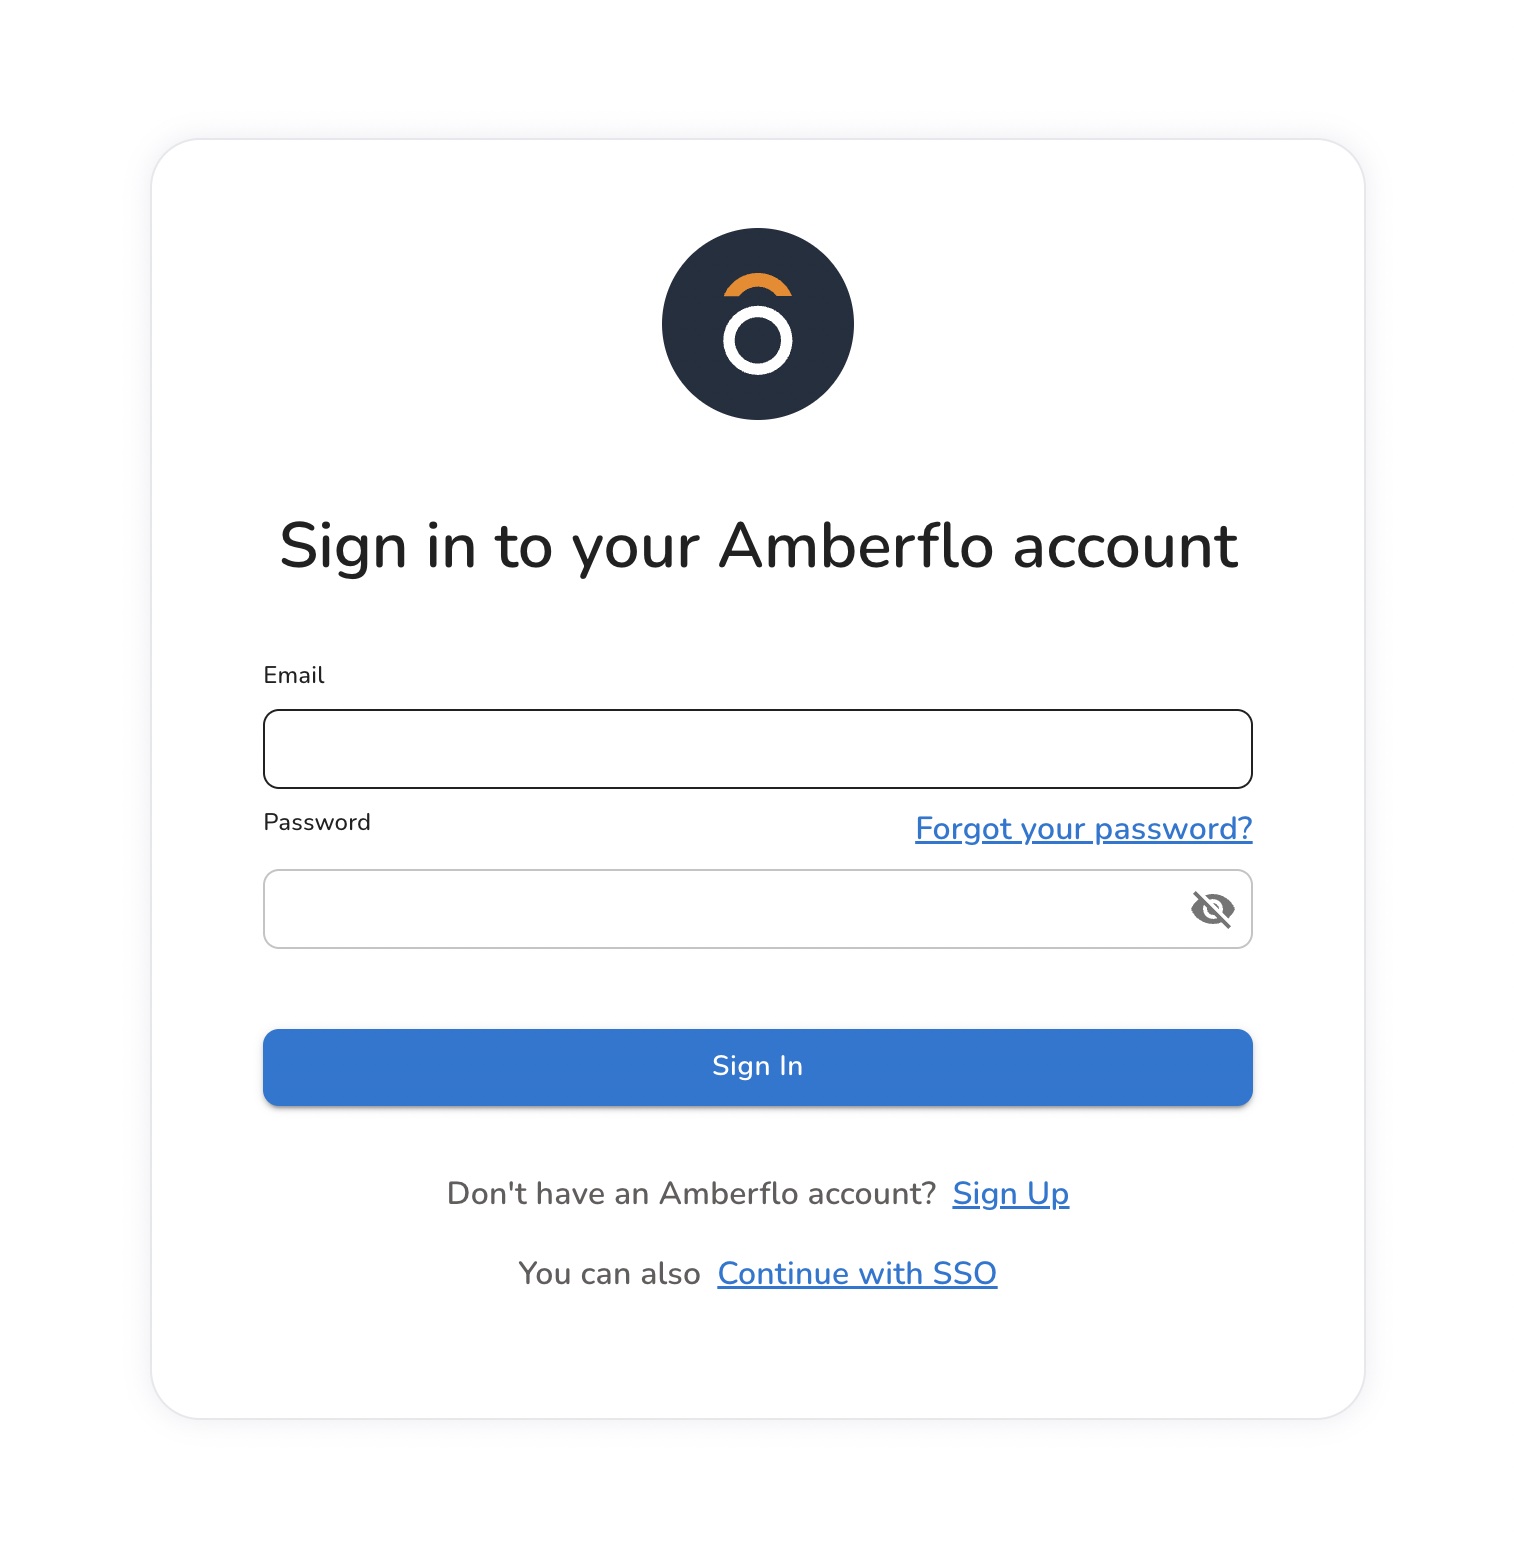
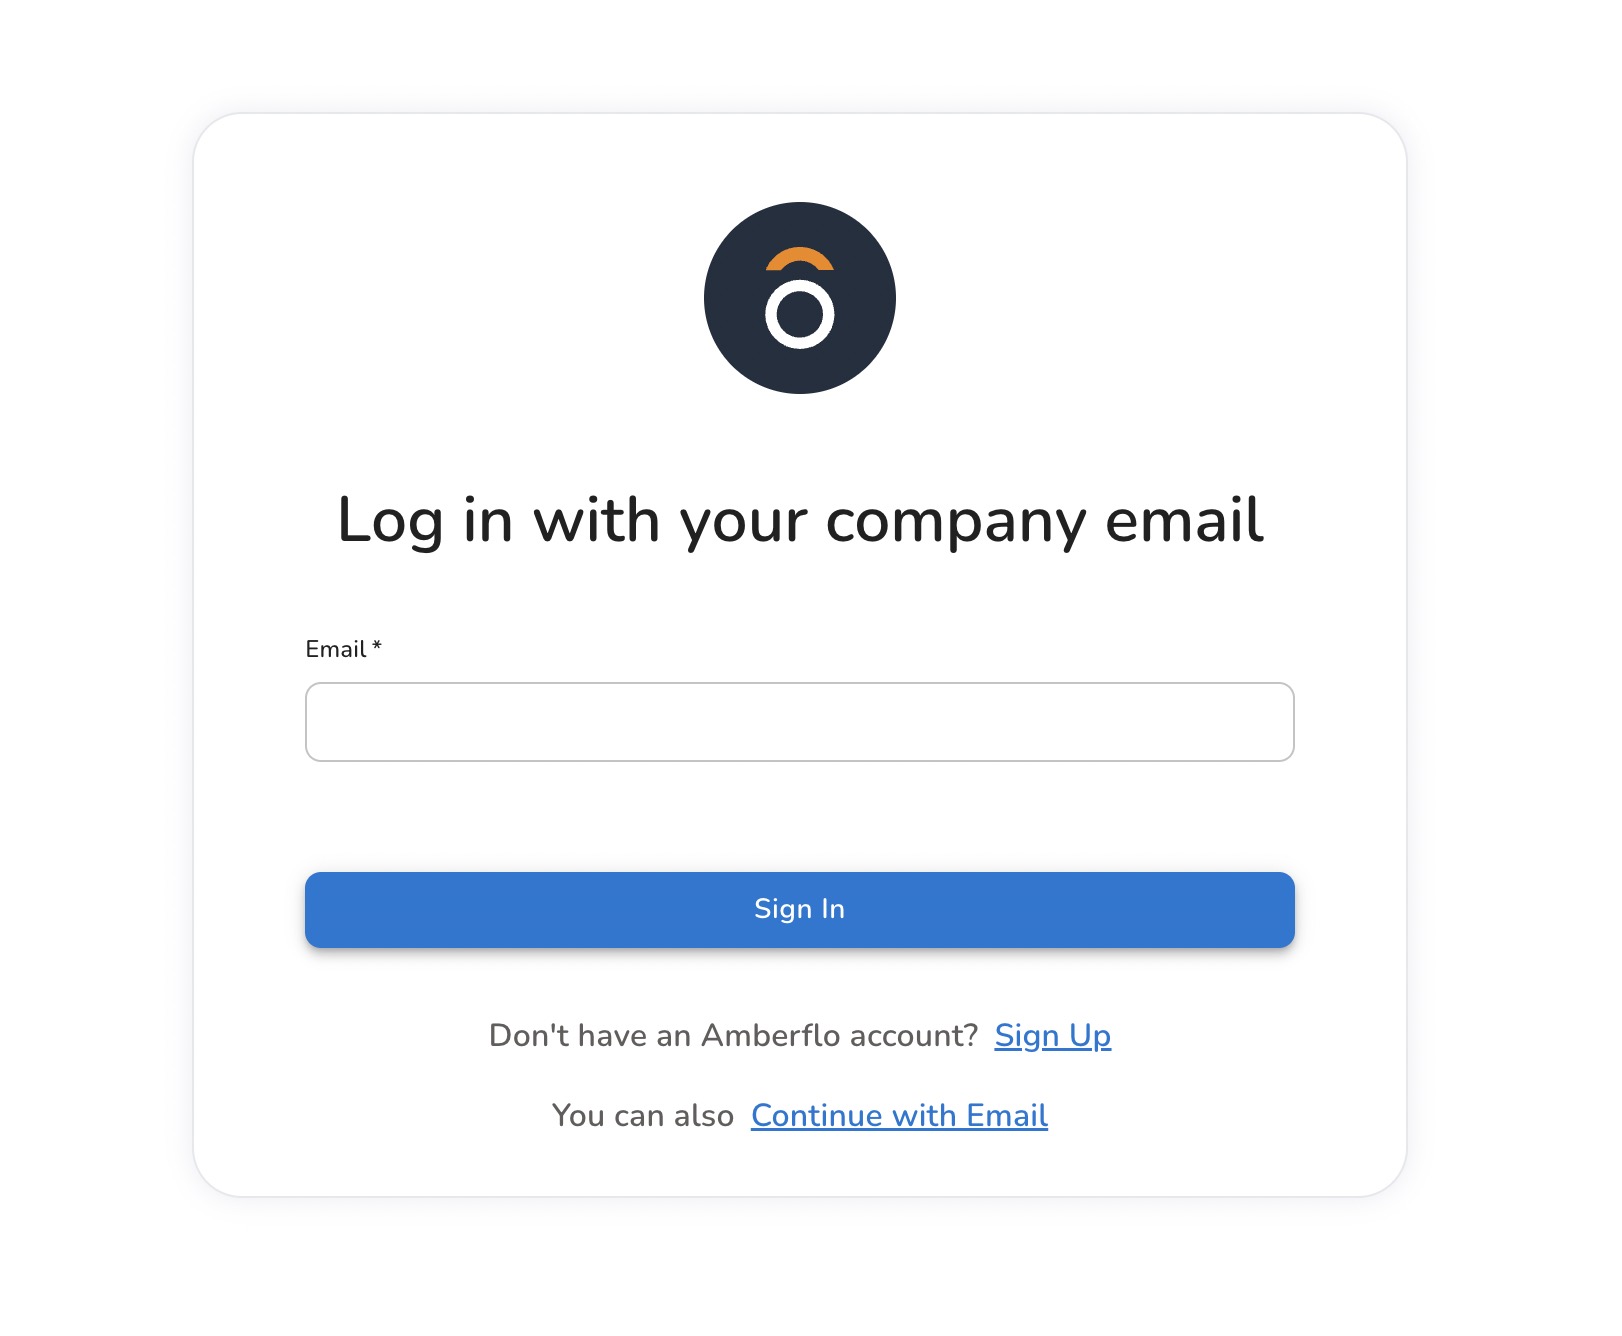
When they do so, we identify the domain from their email address. The domain is used to link this user to the Amberflo account that is associated with the same domain, and then, we automatically create Amberflo users for the account.
Getting Started with SAML SSO
Once logged in, navigate to the SSO Configuration page. There, you’ll see:
- A list of verified email domains associated with your account.
- The Identity Providers (IdPs) configured for each domain.
If you do not have any email domains verified, you will be asked to contact us.
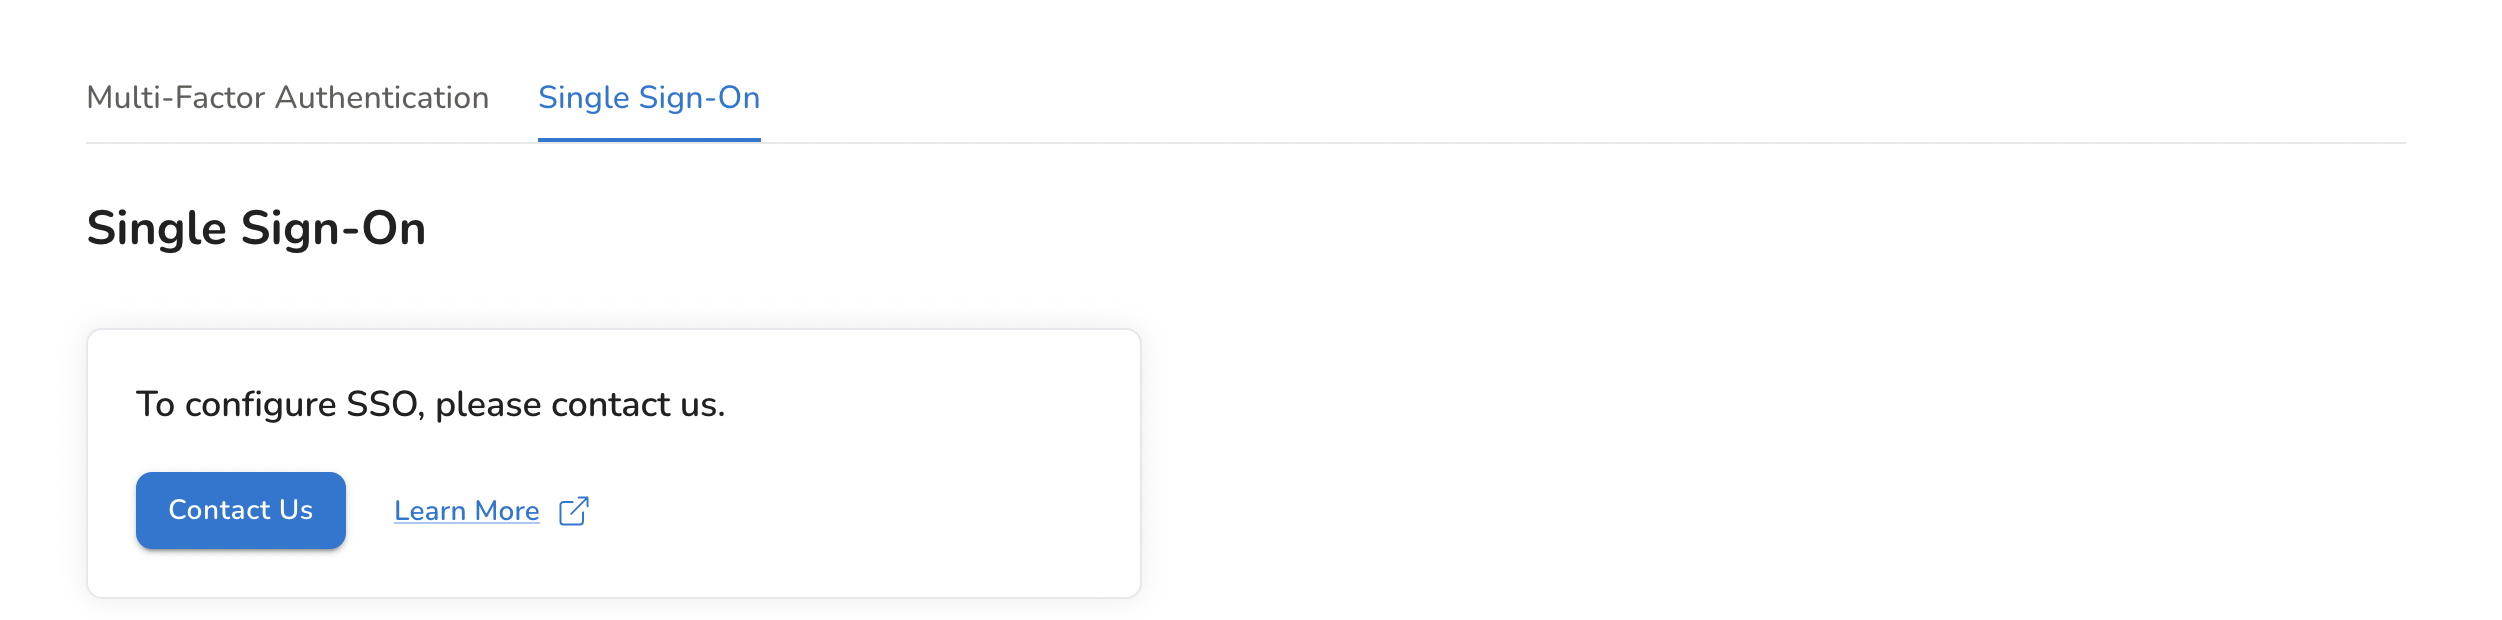
Domain Verification
If no email domains are verified yet, you’ll be prompted to contact Amberflo Support.
To start the verification process:
- Contact support with the domain you want to associate with your Amberflo account.
- Once ownership is verified, the domain will appear in your list.
- Afterward, you can configure an IdP for that domain.
Note: Once an IdP is configured, anyone with an email address from the verified domain will be able to log in using SSO.
Identity Provider Configuration
Amberflo supports any Identity Provider (IdP) that adheres to the SAML standard, including all major enterprise identity platforms.
To configure:
- In your IdP, set up Amberflo as a new application using the SSO URL and Audience values from Amberflo.
- Register your IdP in Amberflo by providing one of the following:
- Metadata URL
- Metadata XML
You may also assign a Name to your IdP for display purposes in the UI.
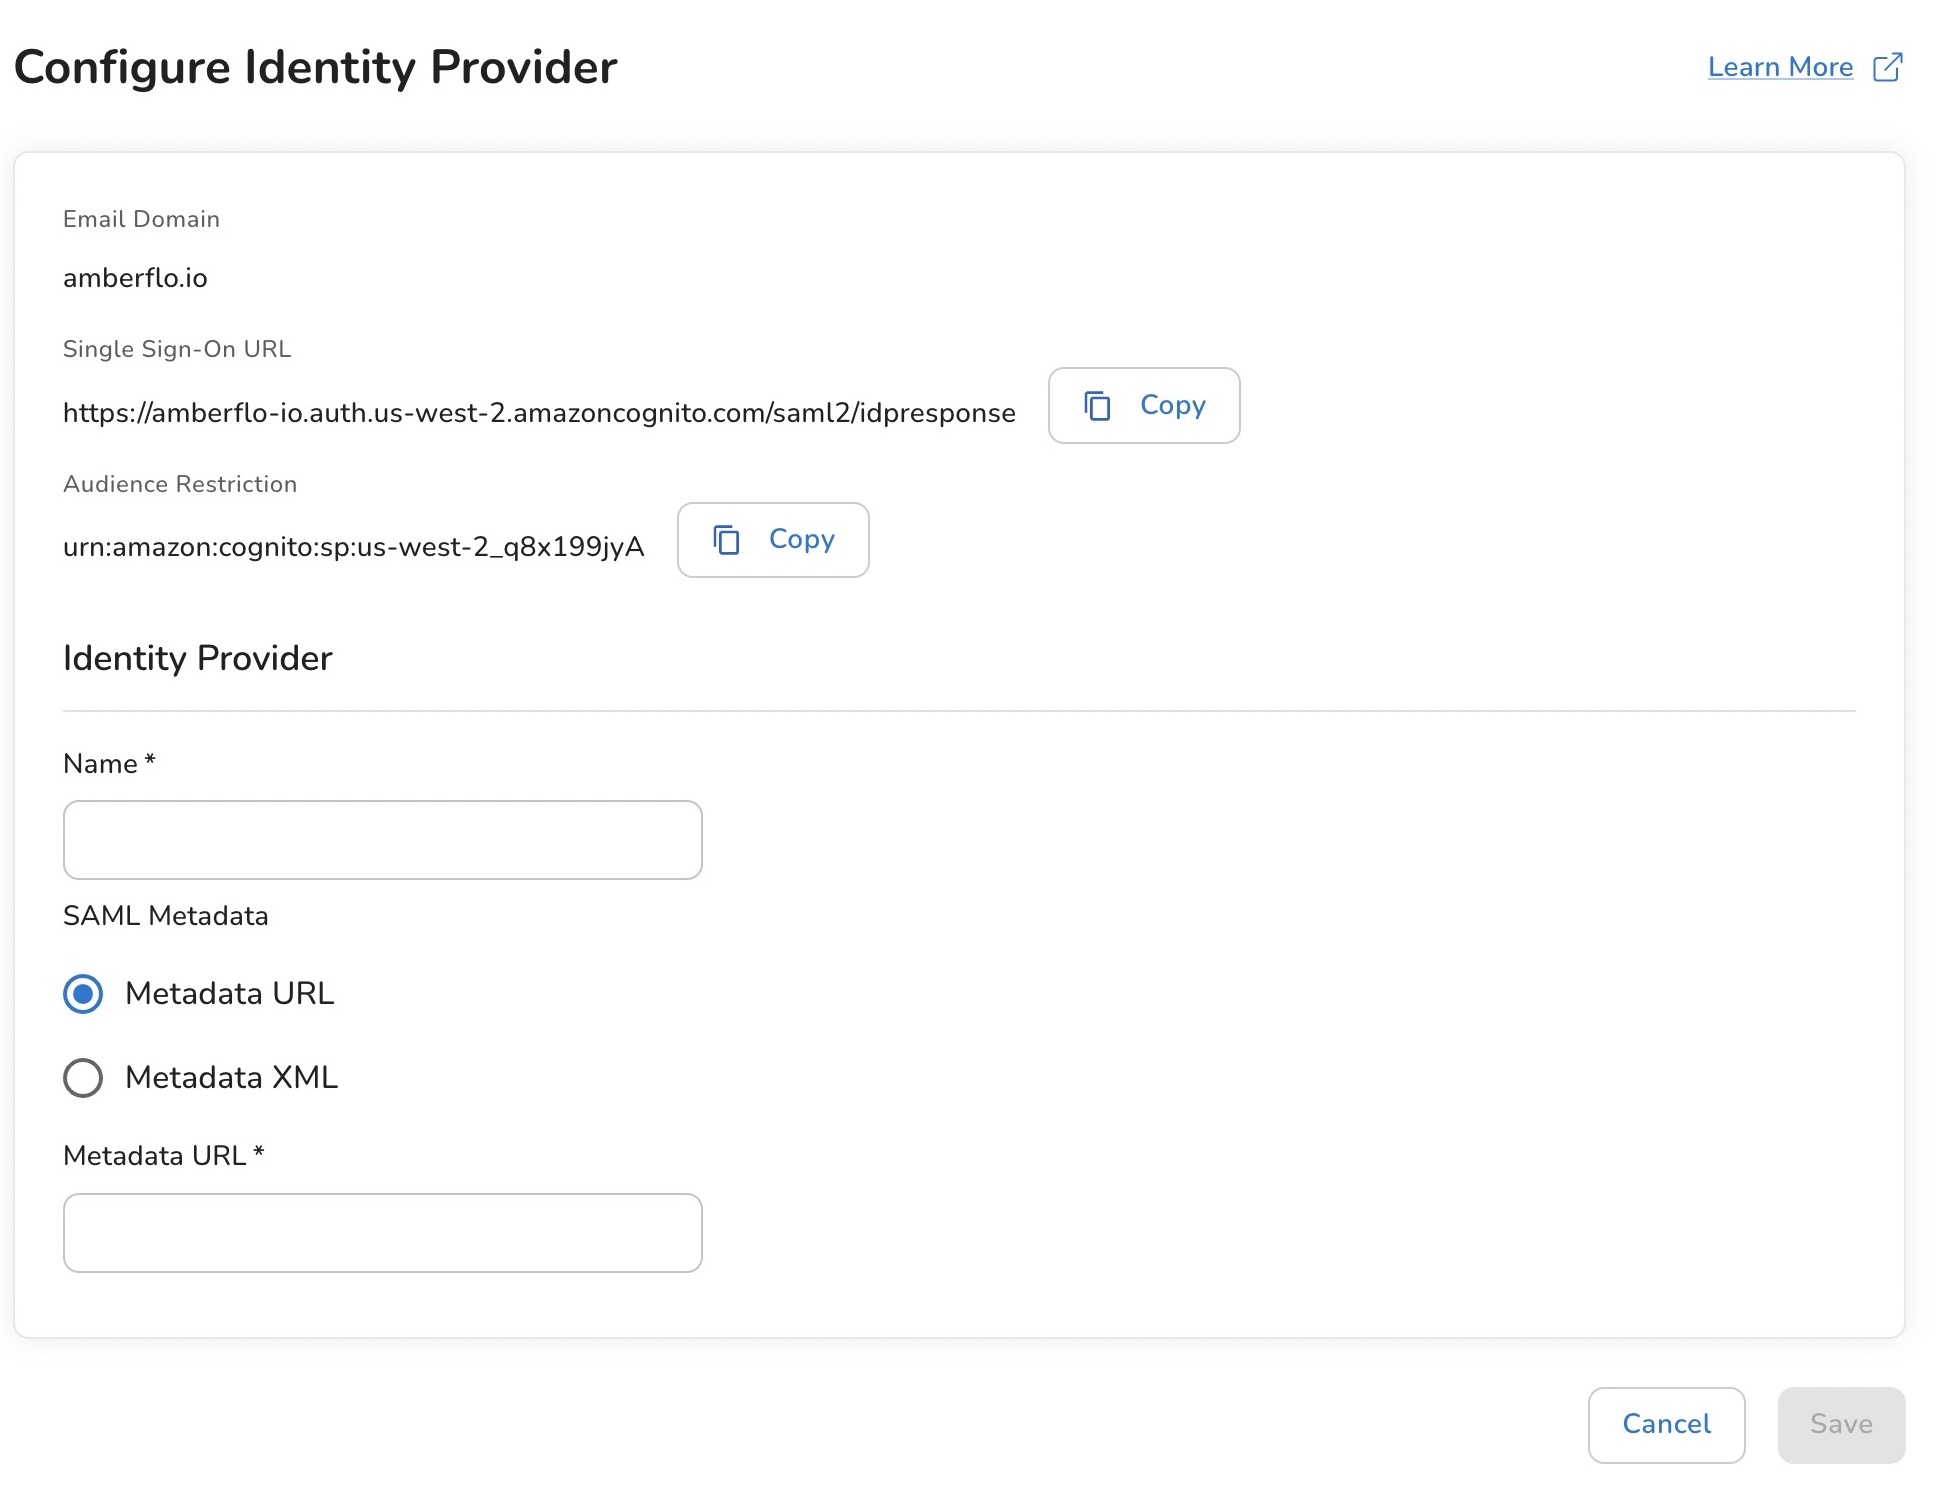
Now, your colleagues can sign in to your Amberflo account using their corporate identity.
FAQ
SSO vs Password Sign-In
- Each user can only use one sign-in method: either SSO or password-based login.
- If your team is using SSO, it’s recommended to maintain a single password-based "root" user and have all other users sign in via SSO.
- If a user currently signs in with a password and needs to switch to SSO, they must first be removed from the account.
- When a user signs in with SSO for the first time, they are automatically assigned the Analyst role. If the user previously had a different role, you’ll need to manually update their role after the switch.
IdP-Initiated Sign-In
- Amberflo does not support IdP-initiated sign-ins (i.e., starting login from your Identity Provider's dashboard).
- Attempting to log in directly from the IdP may result in the following error: Invalid samlResponse or relayState from identity provider
Workaround:
Create a “bookmark” or “link app” in your IdP that directs users to https://ui.amberflo.io to initiate the login flow correctly.
Common errors
Invalid samlResponse or relayState from identity provider
- This typically occurs when trying to perform an IdP-initiated login, which is not supported by Amberflo.
- Ensure users always start from the Amberflo login page to avoid this error.
Appendix: Identity Provider Setup
You’ll find instructions for specific identity providers below. If your provider isn’t listed, please reach out to us for assistance.
Okta
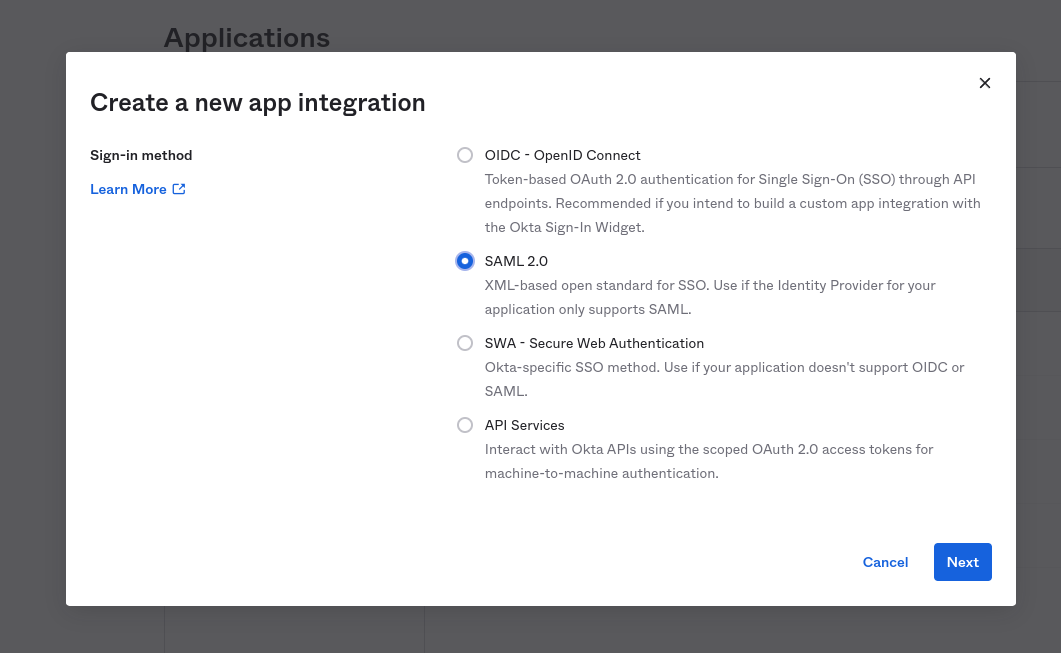
On your Okta admin console, navigate to Applications, click Create App Integration, select SAML 2.0, then click Next.
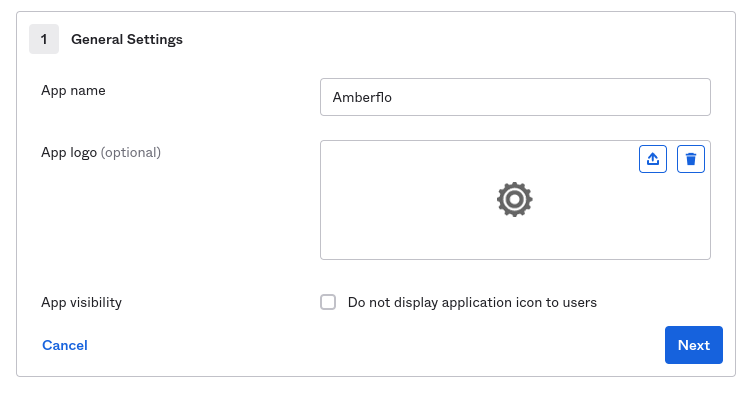
On the General Settings, set the App name to "Amberflo" then click Next.
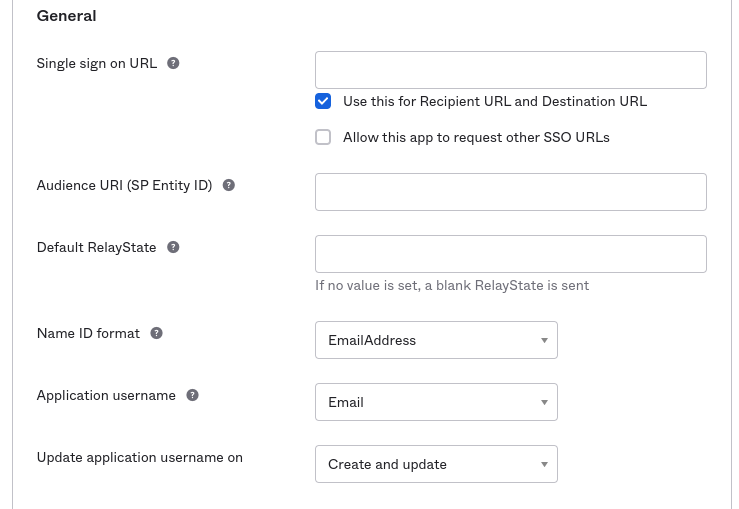
On the SAML Settings, set the fields like this:
Field | Value |
|---|---|
Single sign on URL | The SSO URL given when configuring a domain from the SSO config page |
Audience URI (SP Entity ID) | The Audience given when configuring a domain from the SSO config page |
Name ID format | Set to EmailAddress |
Application username | Set to Email |
Leave the other fields with the default values.
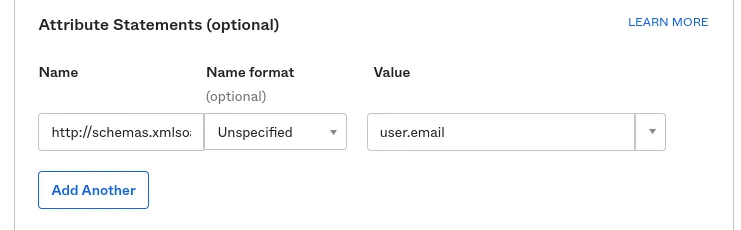
Scroll down to Attribute Statements. Add a single entry:
Name | Name Format | Value |
|---|---|---|
Unspecified | user.email |
Scroll down and click Next.
Now select I'm an Okta customer adding an internal app and click Finish.
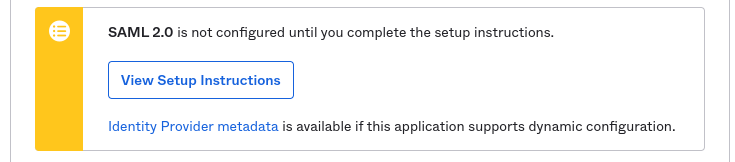
You'll see a box highlighted in yellow. It contains a link to the identity provider metadata. Copy this link and input it when registering the IdP in Amberflo.
That's it.
Troubleshooting Okta SSO
Error: Invalid samlResponse or relayState from identity provider
This error occurs because our authentication service does not support an authentication flow initiated from the Identity Provider (IdP) app.
To resolve:
- Go to https://ui.amberflo.io and click Continue with SSO
- Or navigate directly to https://ui.amberflo.io/sso
Alternative workaround:
You can bookmark the direct login link in Okta. Follow Okta's bookmark app instructions. If you need your direct login link, please contact us and we’ll provide it.
Auth0
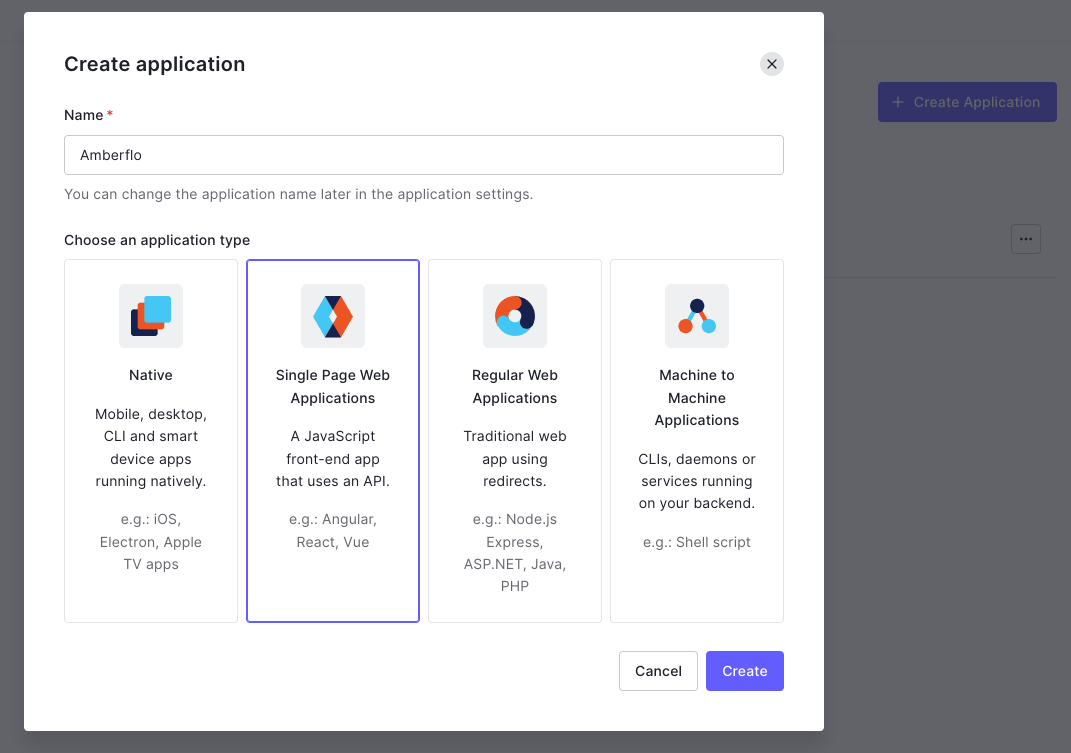
On your Auth0 admin console, navigate to Applications, click Create Application, type in "Amberflo" in the Name field, select Single Page Web Applications, and then click Next.
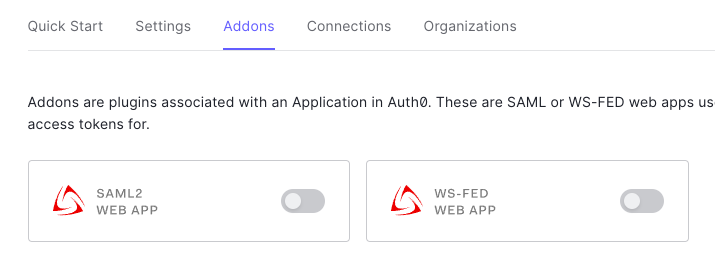
Now go to the Addons tab and activate the SAML2 addon.
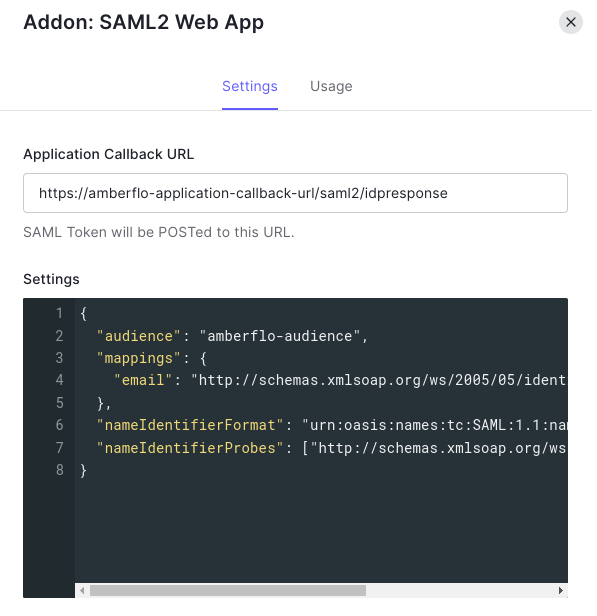
On the addon configuration modal, go to the Settings tab.
Add Amberflo's SSO URL in the Application Callback URL field, and update the Settings JSON to the following value, making sure to use the Amberflo provided Audience value.
{
  "audience": "<Amberflo's Audience>",
  "mappings": {
    "email": "http://schemas.xmlsoap.org/ws/2005/05/identity/claims/emailaddress"
  },
  "nameIdentifierFormat": "urn:oasis:names:tc:SAML:1.1:nameid-format:emailAddress",
  "nameIdentifierProbes": [
    "http://schemas.xmlsoap.org/ws/2005/05/identity/claims/emailaddress"
  ]
}
Scroll down and click Save.
Now go back to the Settings tab. You'll see an Identity Provider Metadata download link. Copy this link and input it when creating the identity provider in Amberflo.
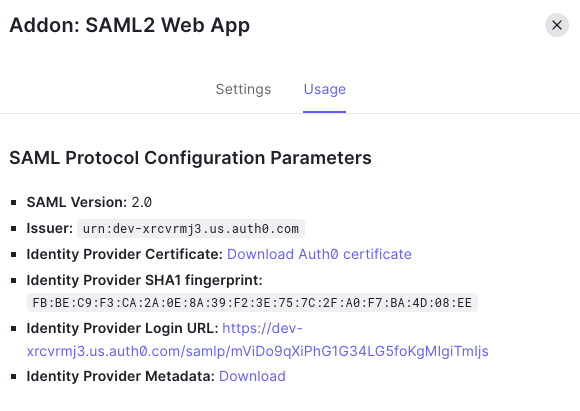
That's it.
Google Workspace
On your Google Workspace admin console, navigate to Apps > Web and mobile apps.
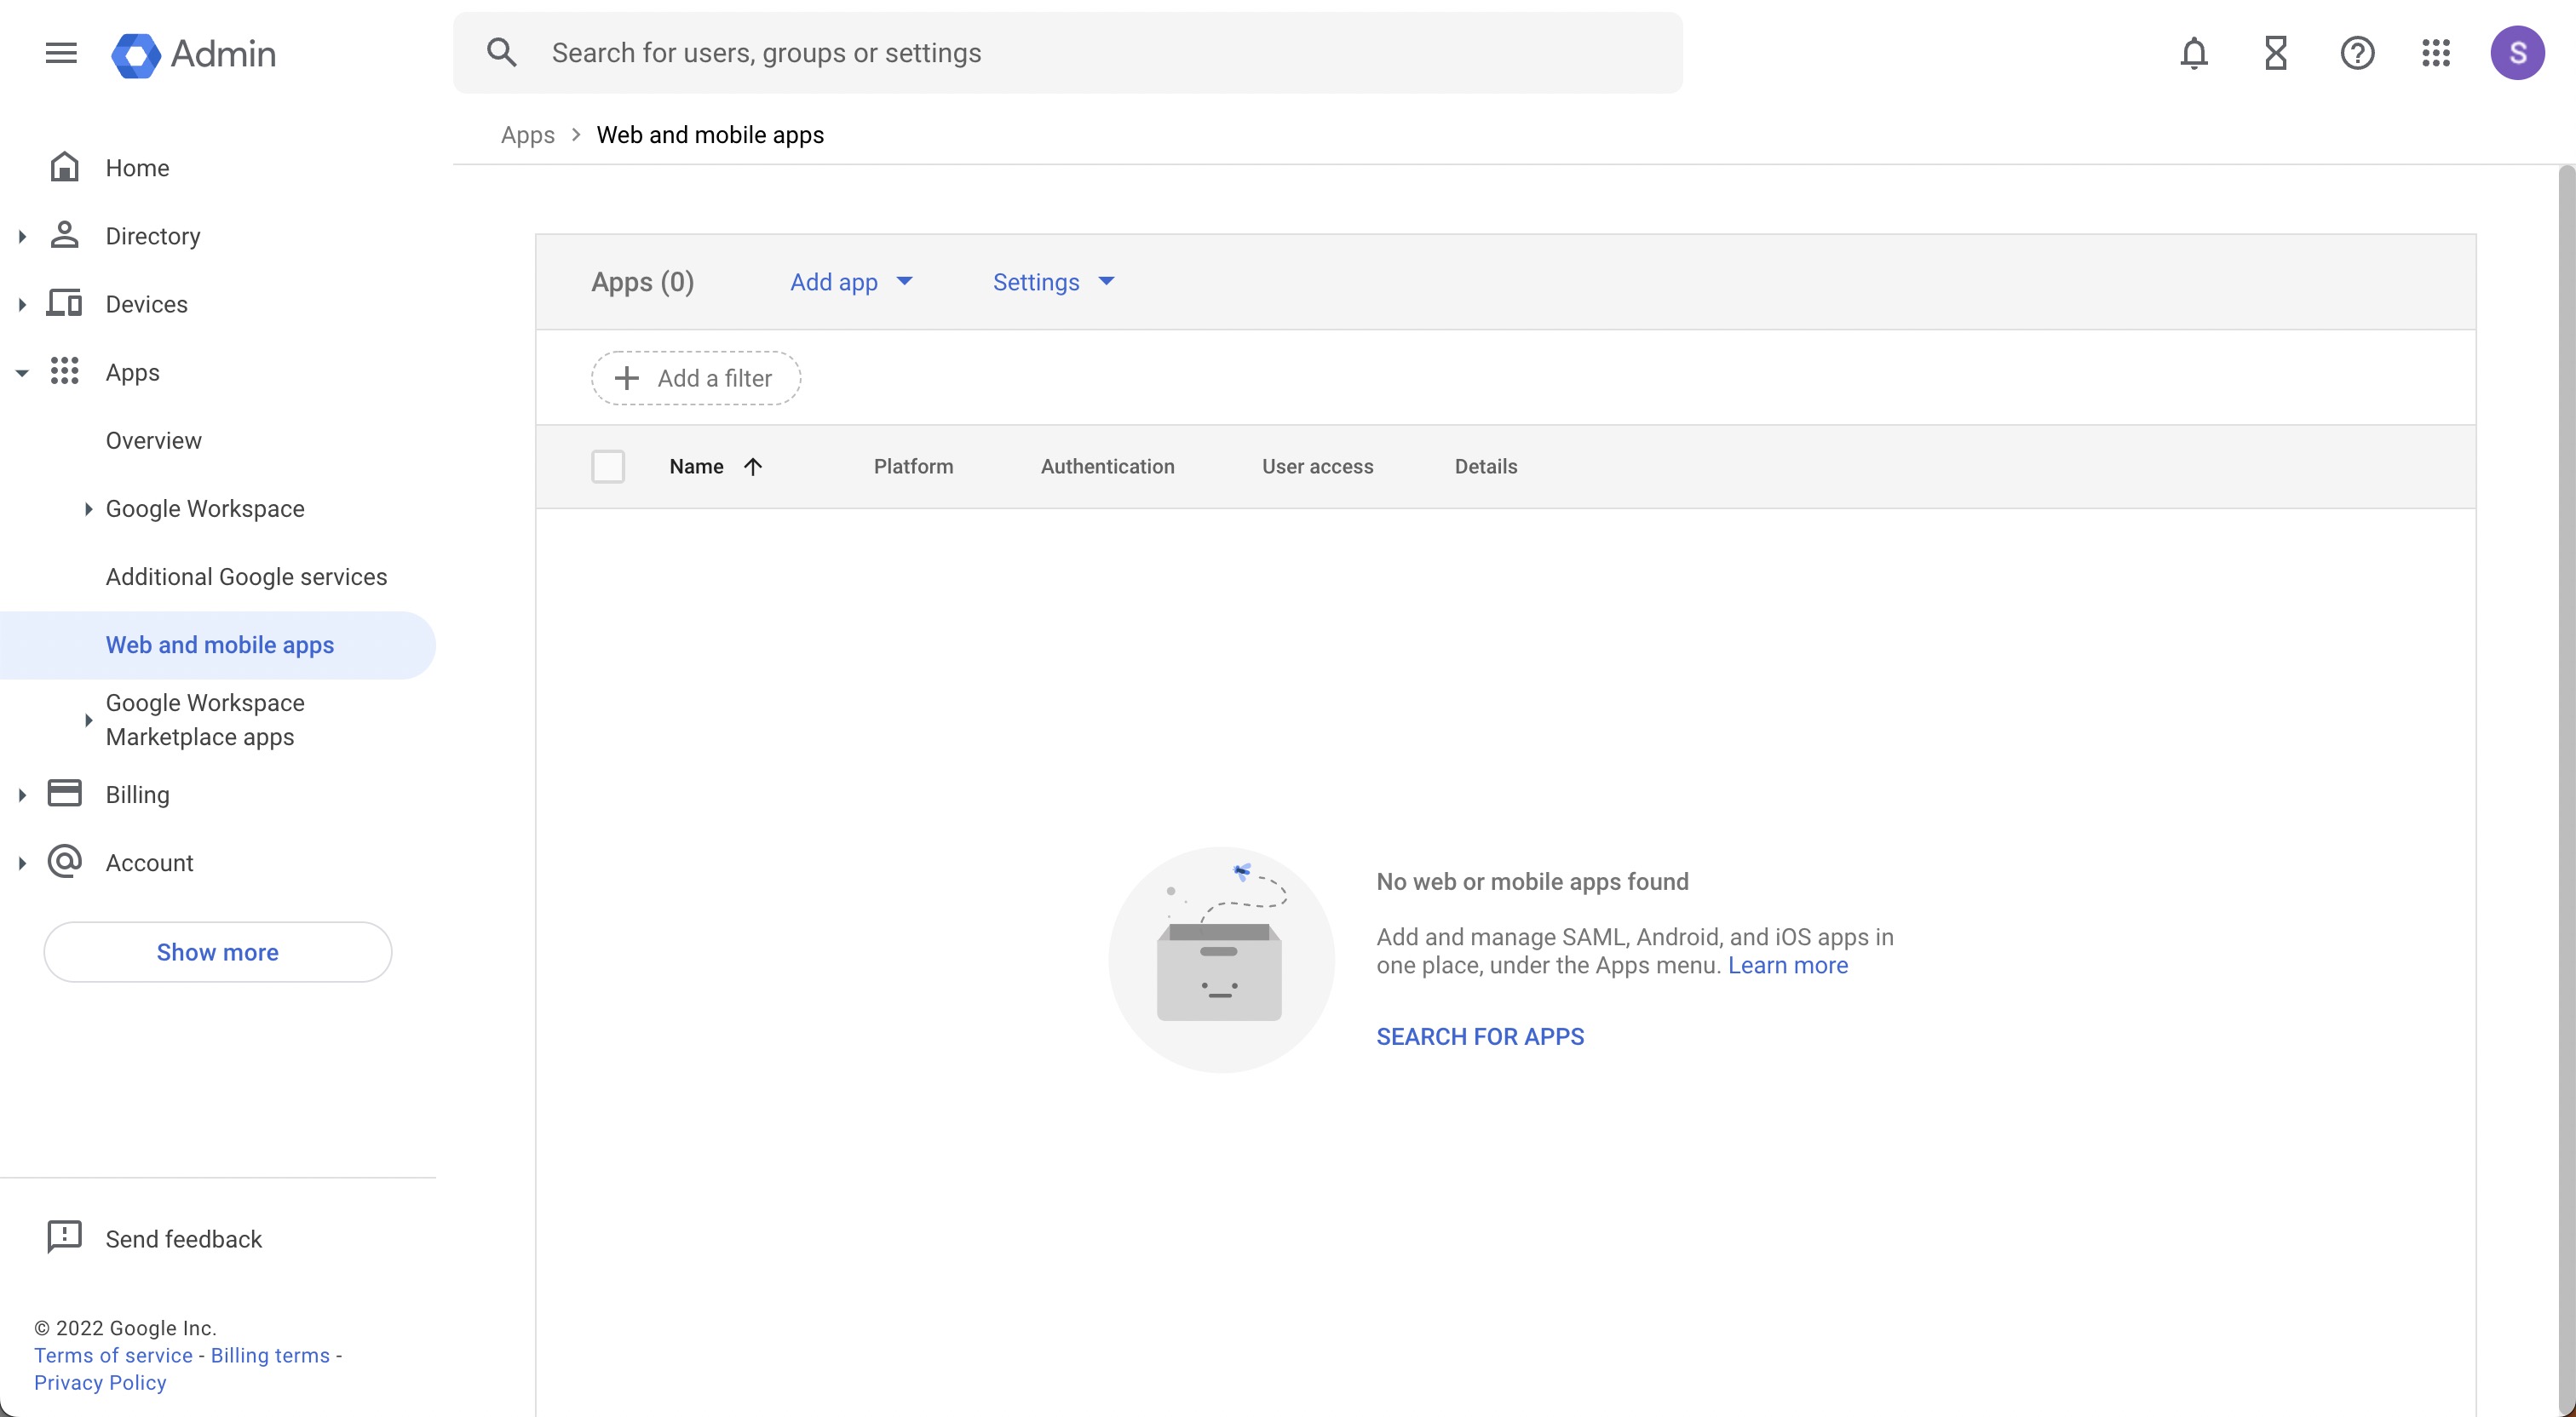
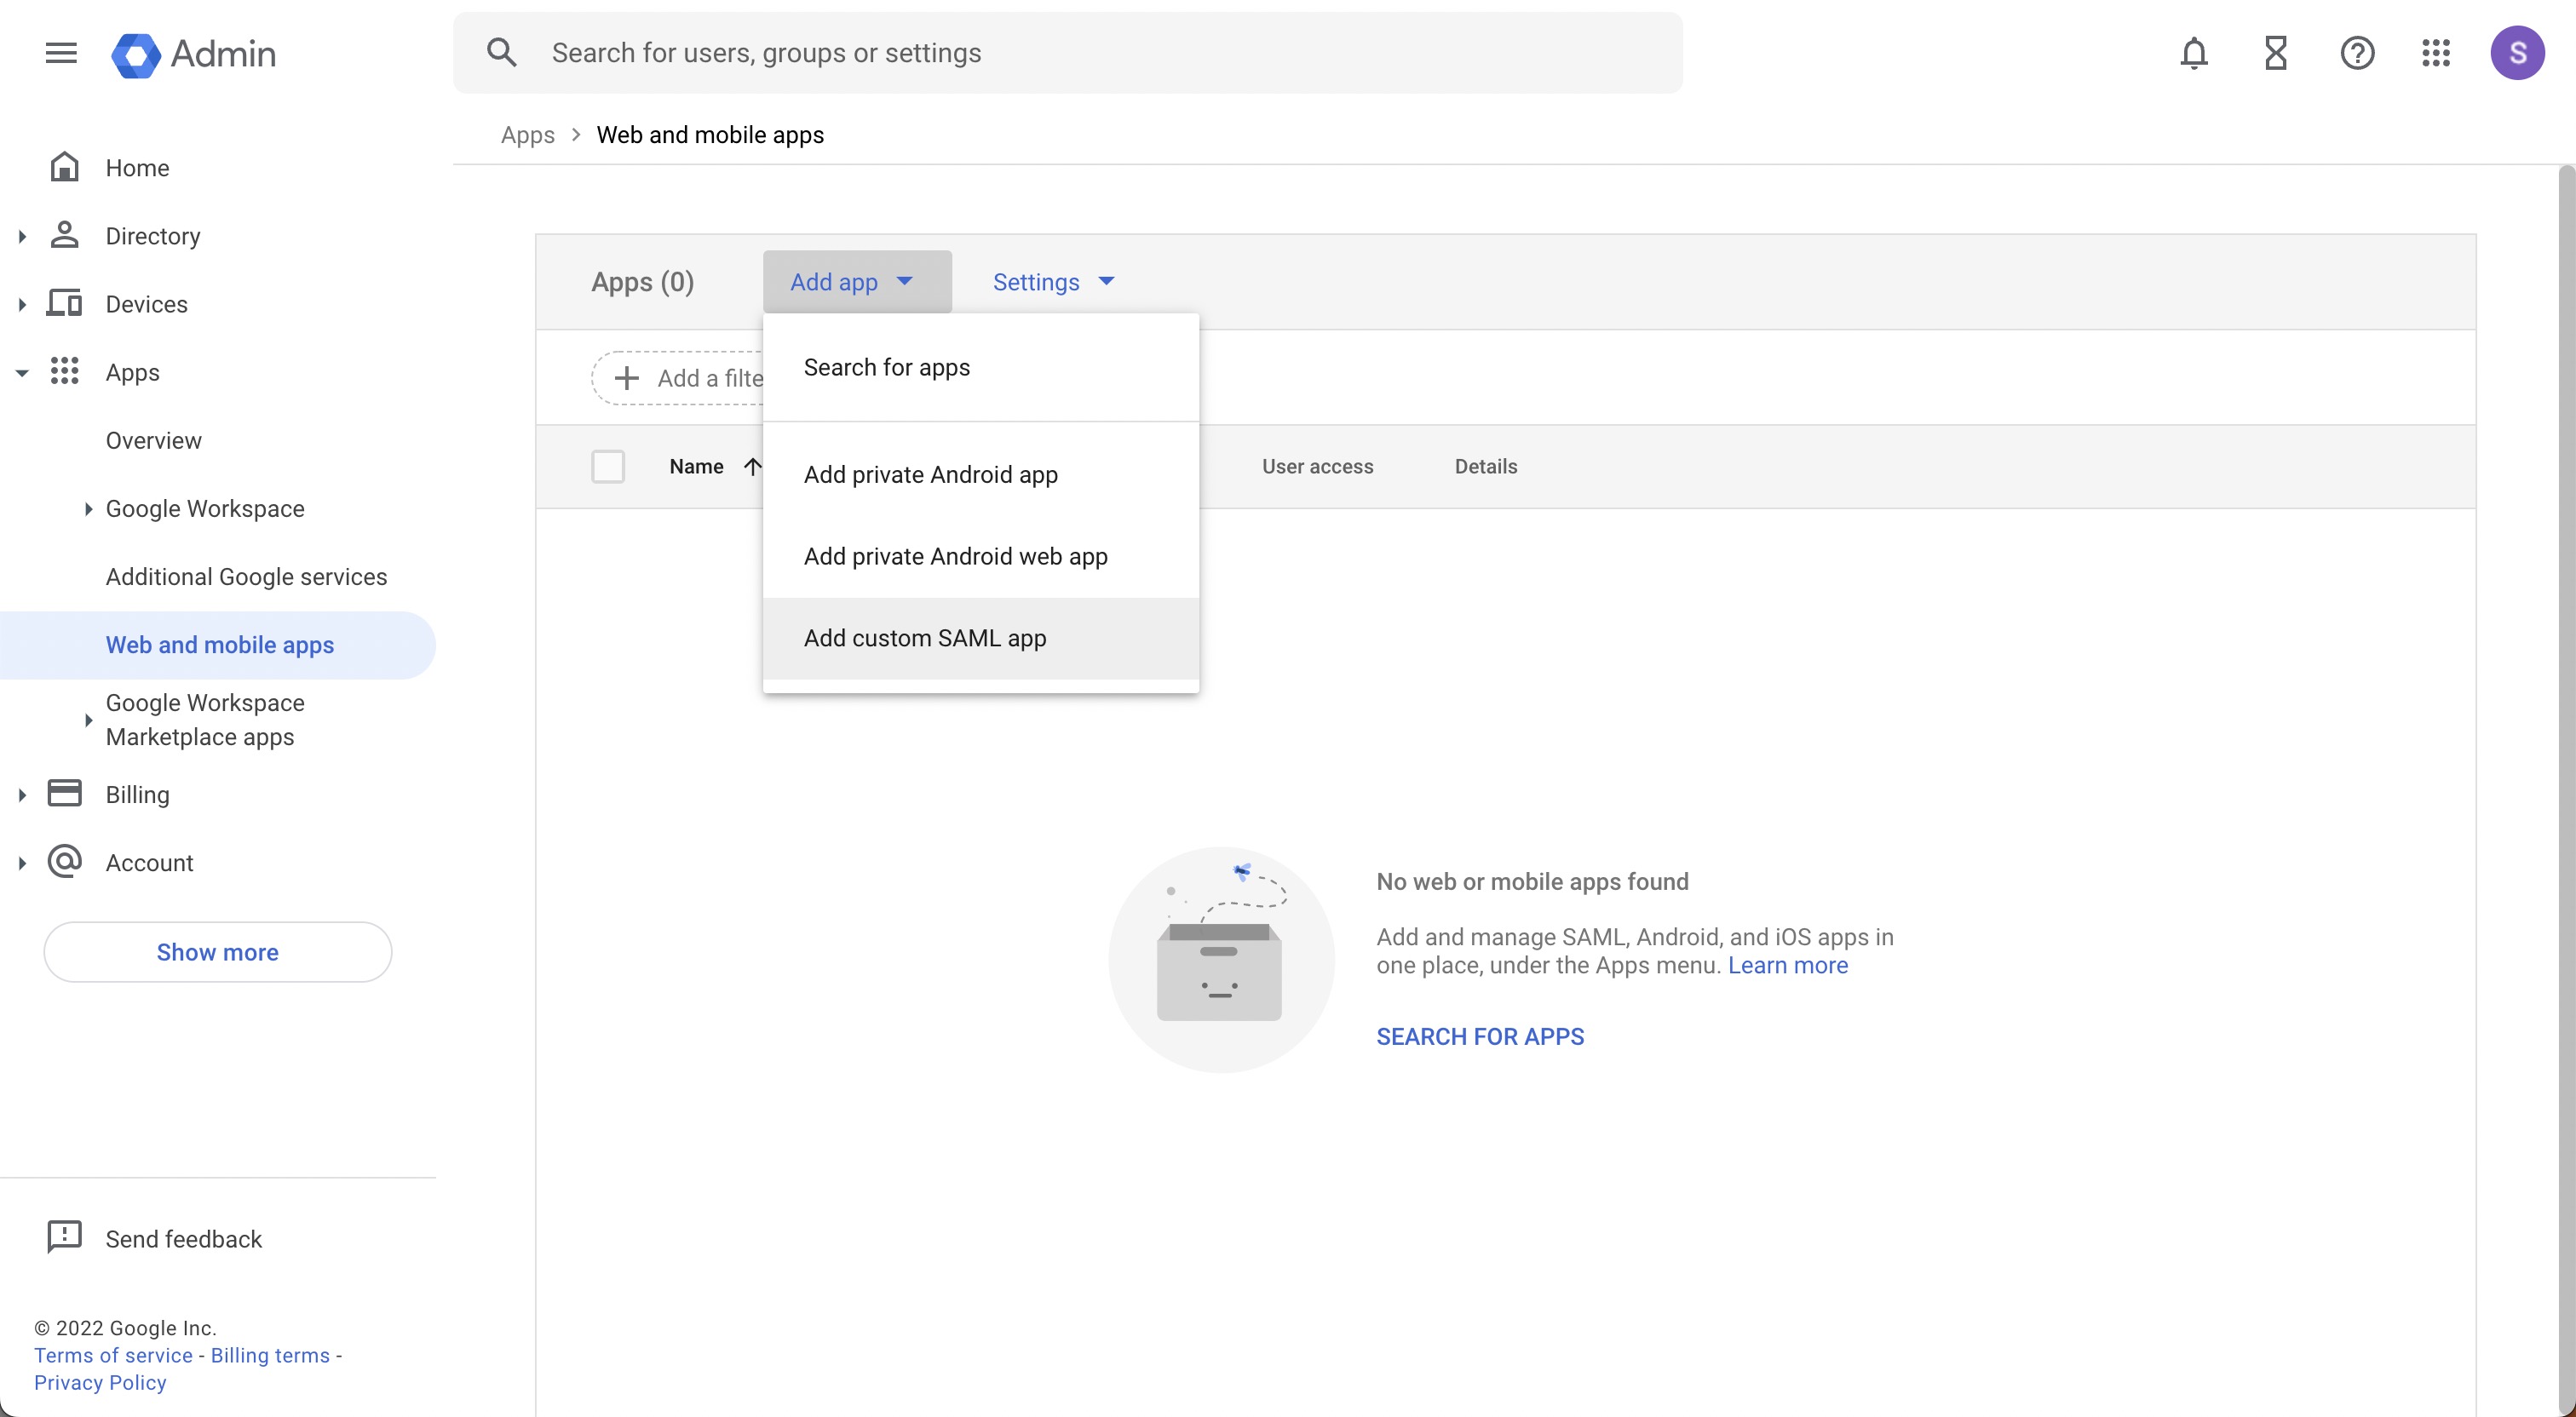
Click Add App > Add custom SAML app.
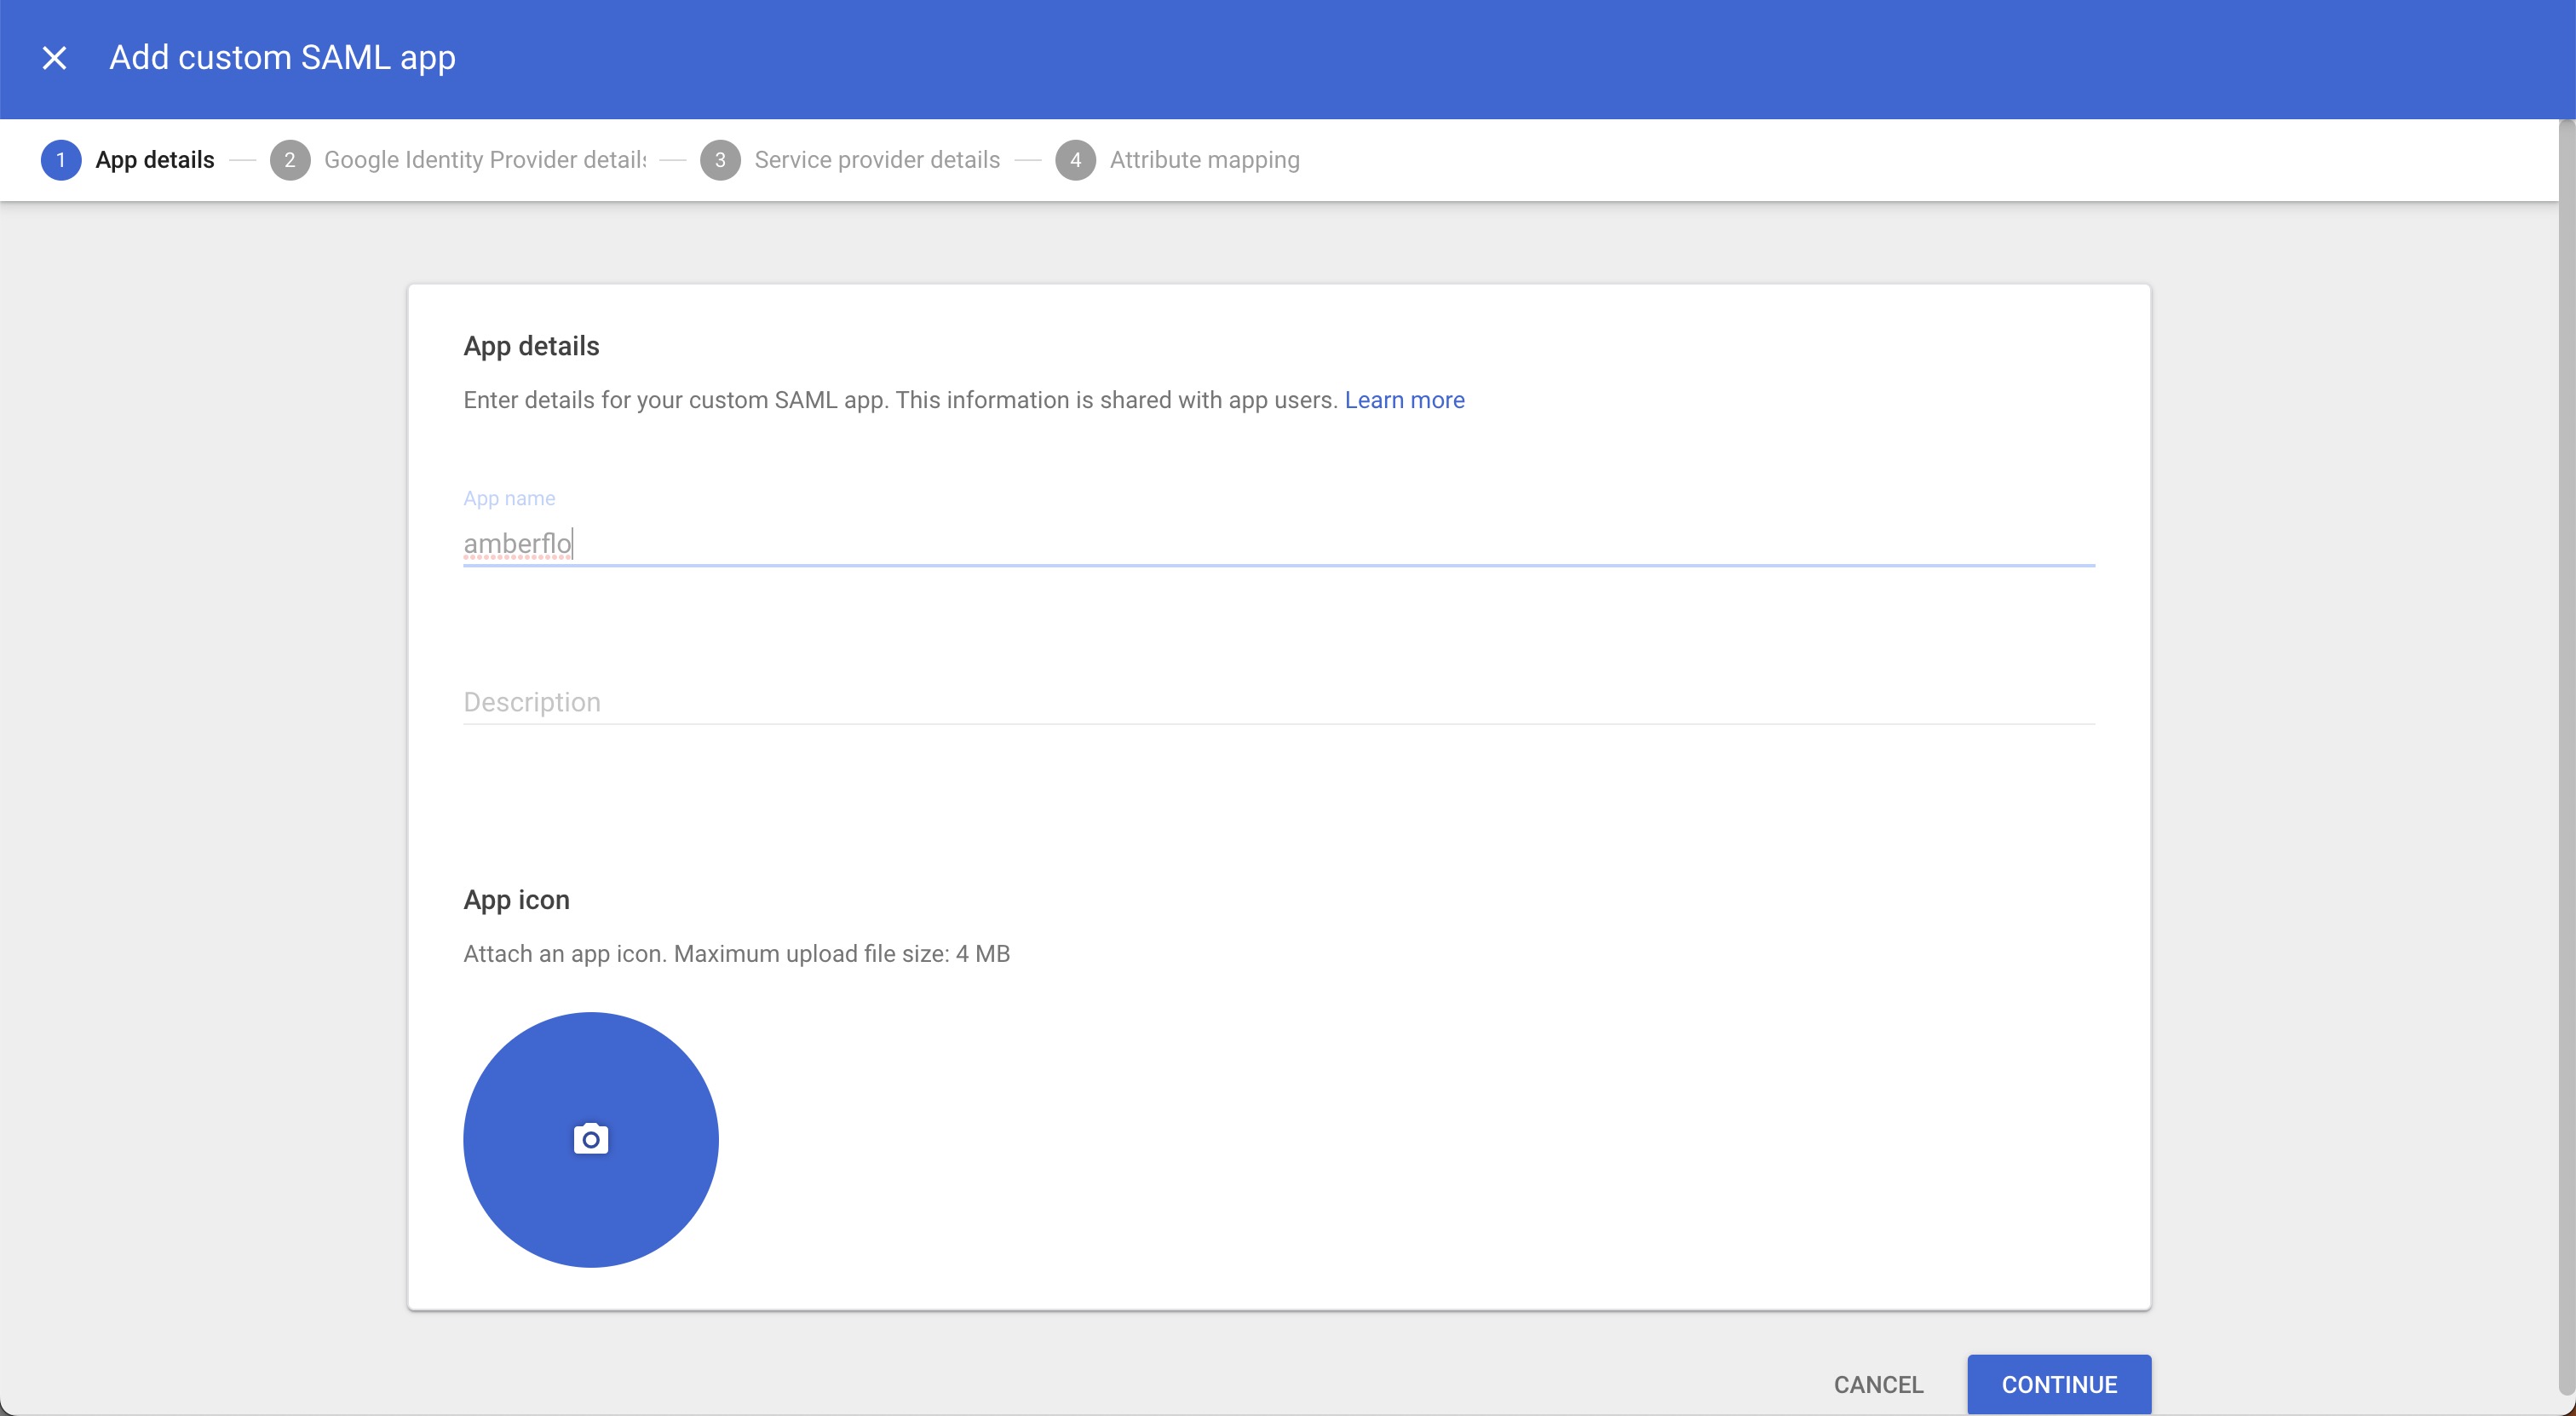
On the App Details page, enter the name of the custom app. In our example, we named it amberflo. Click Continue.
On the Google Identity Provider details page, get the setup information needed by the service provider using the Download the IdP metadata option. You will use the provided XML for the Metadata XML value when configuring your IdP in Amberflo. Click Continue.
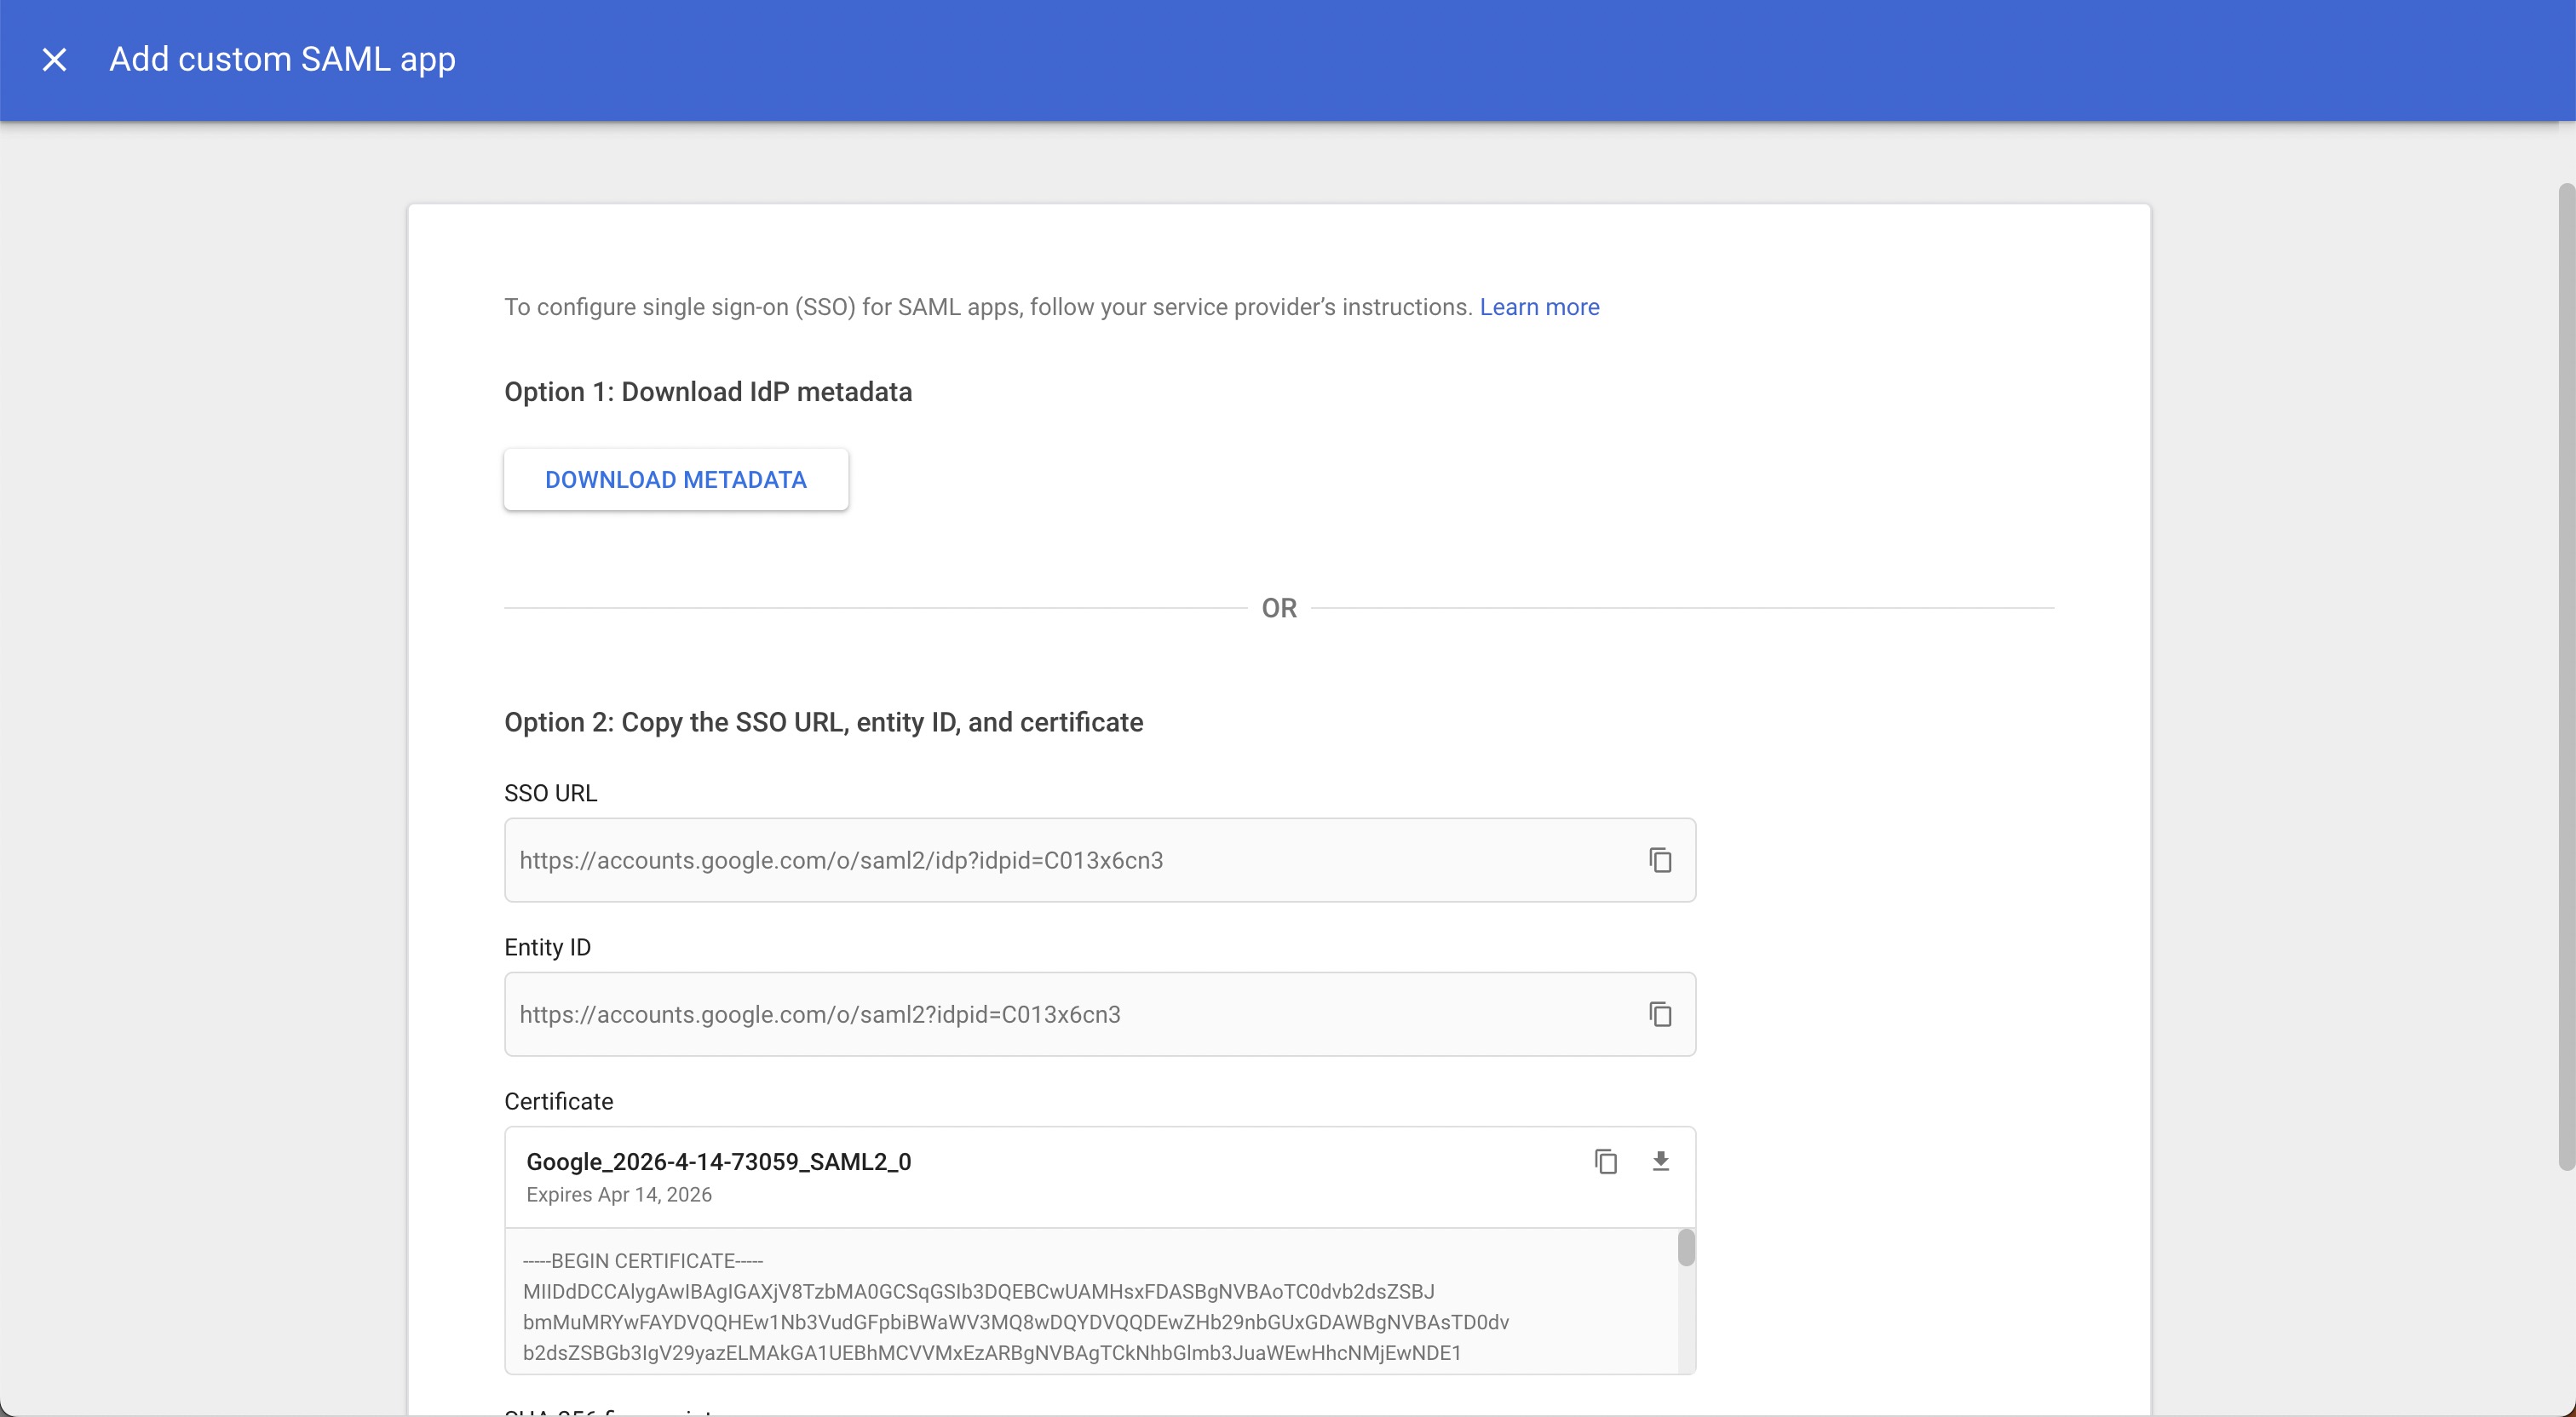
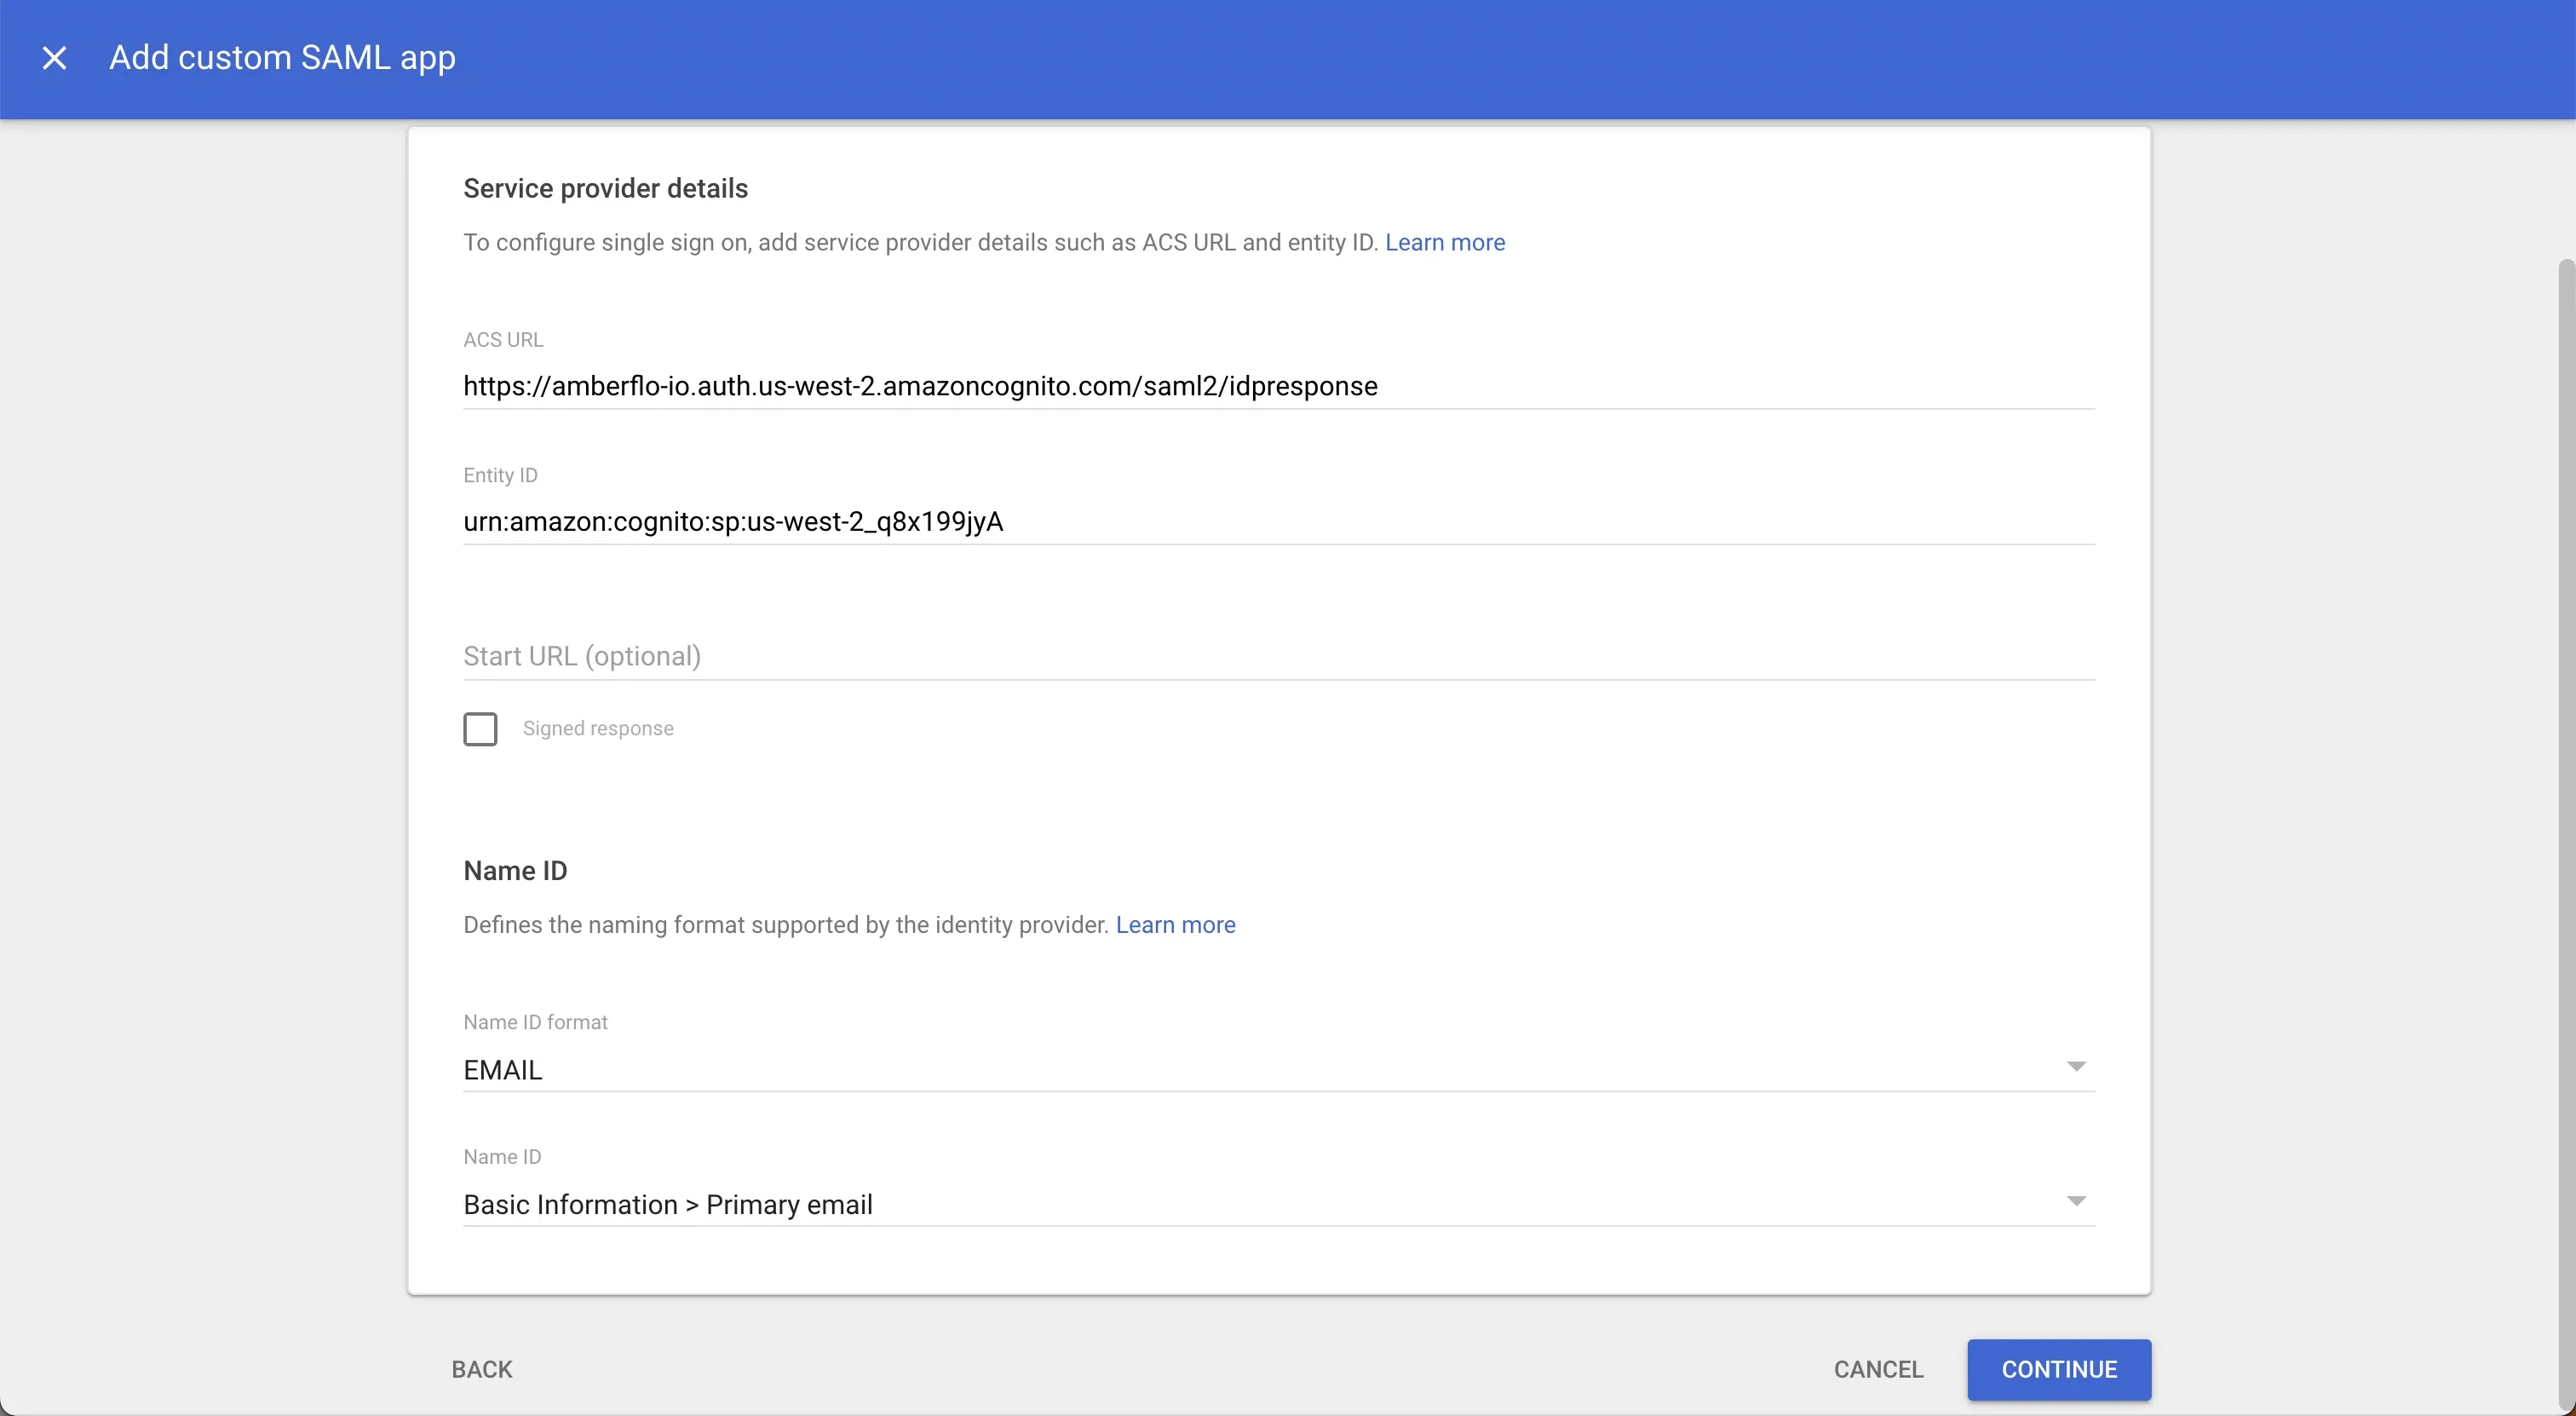
In the Service Provider Details window, enter an ACS URL and Entity ID. These values are all provided by clicking the Configure button for the domain you are configuring at Settings > Security > Single Sign-on. Use the Single Sign-On URL for ACS URL value and Audience Restriction Value for Entity ID
In the Name ID Format dropdown, select EMAIL. In the Name ID dropdown, select Basic Information > Primary Email. Click Continue.
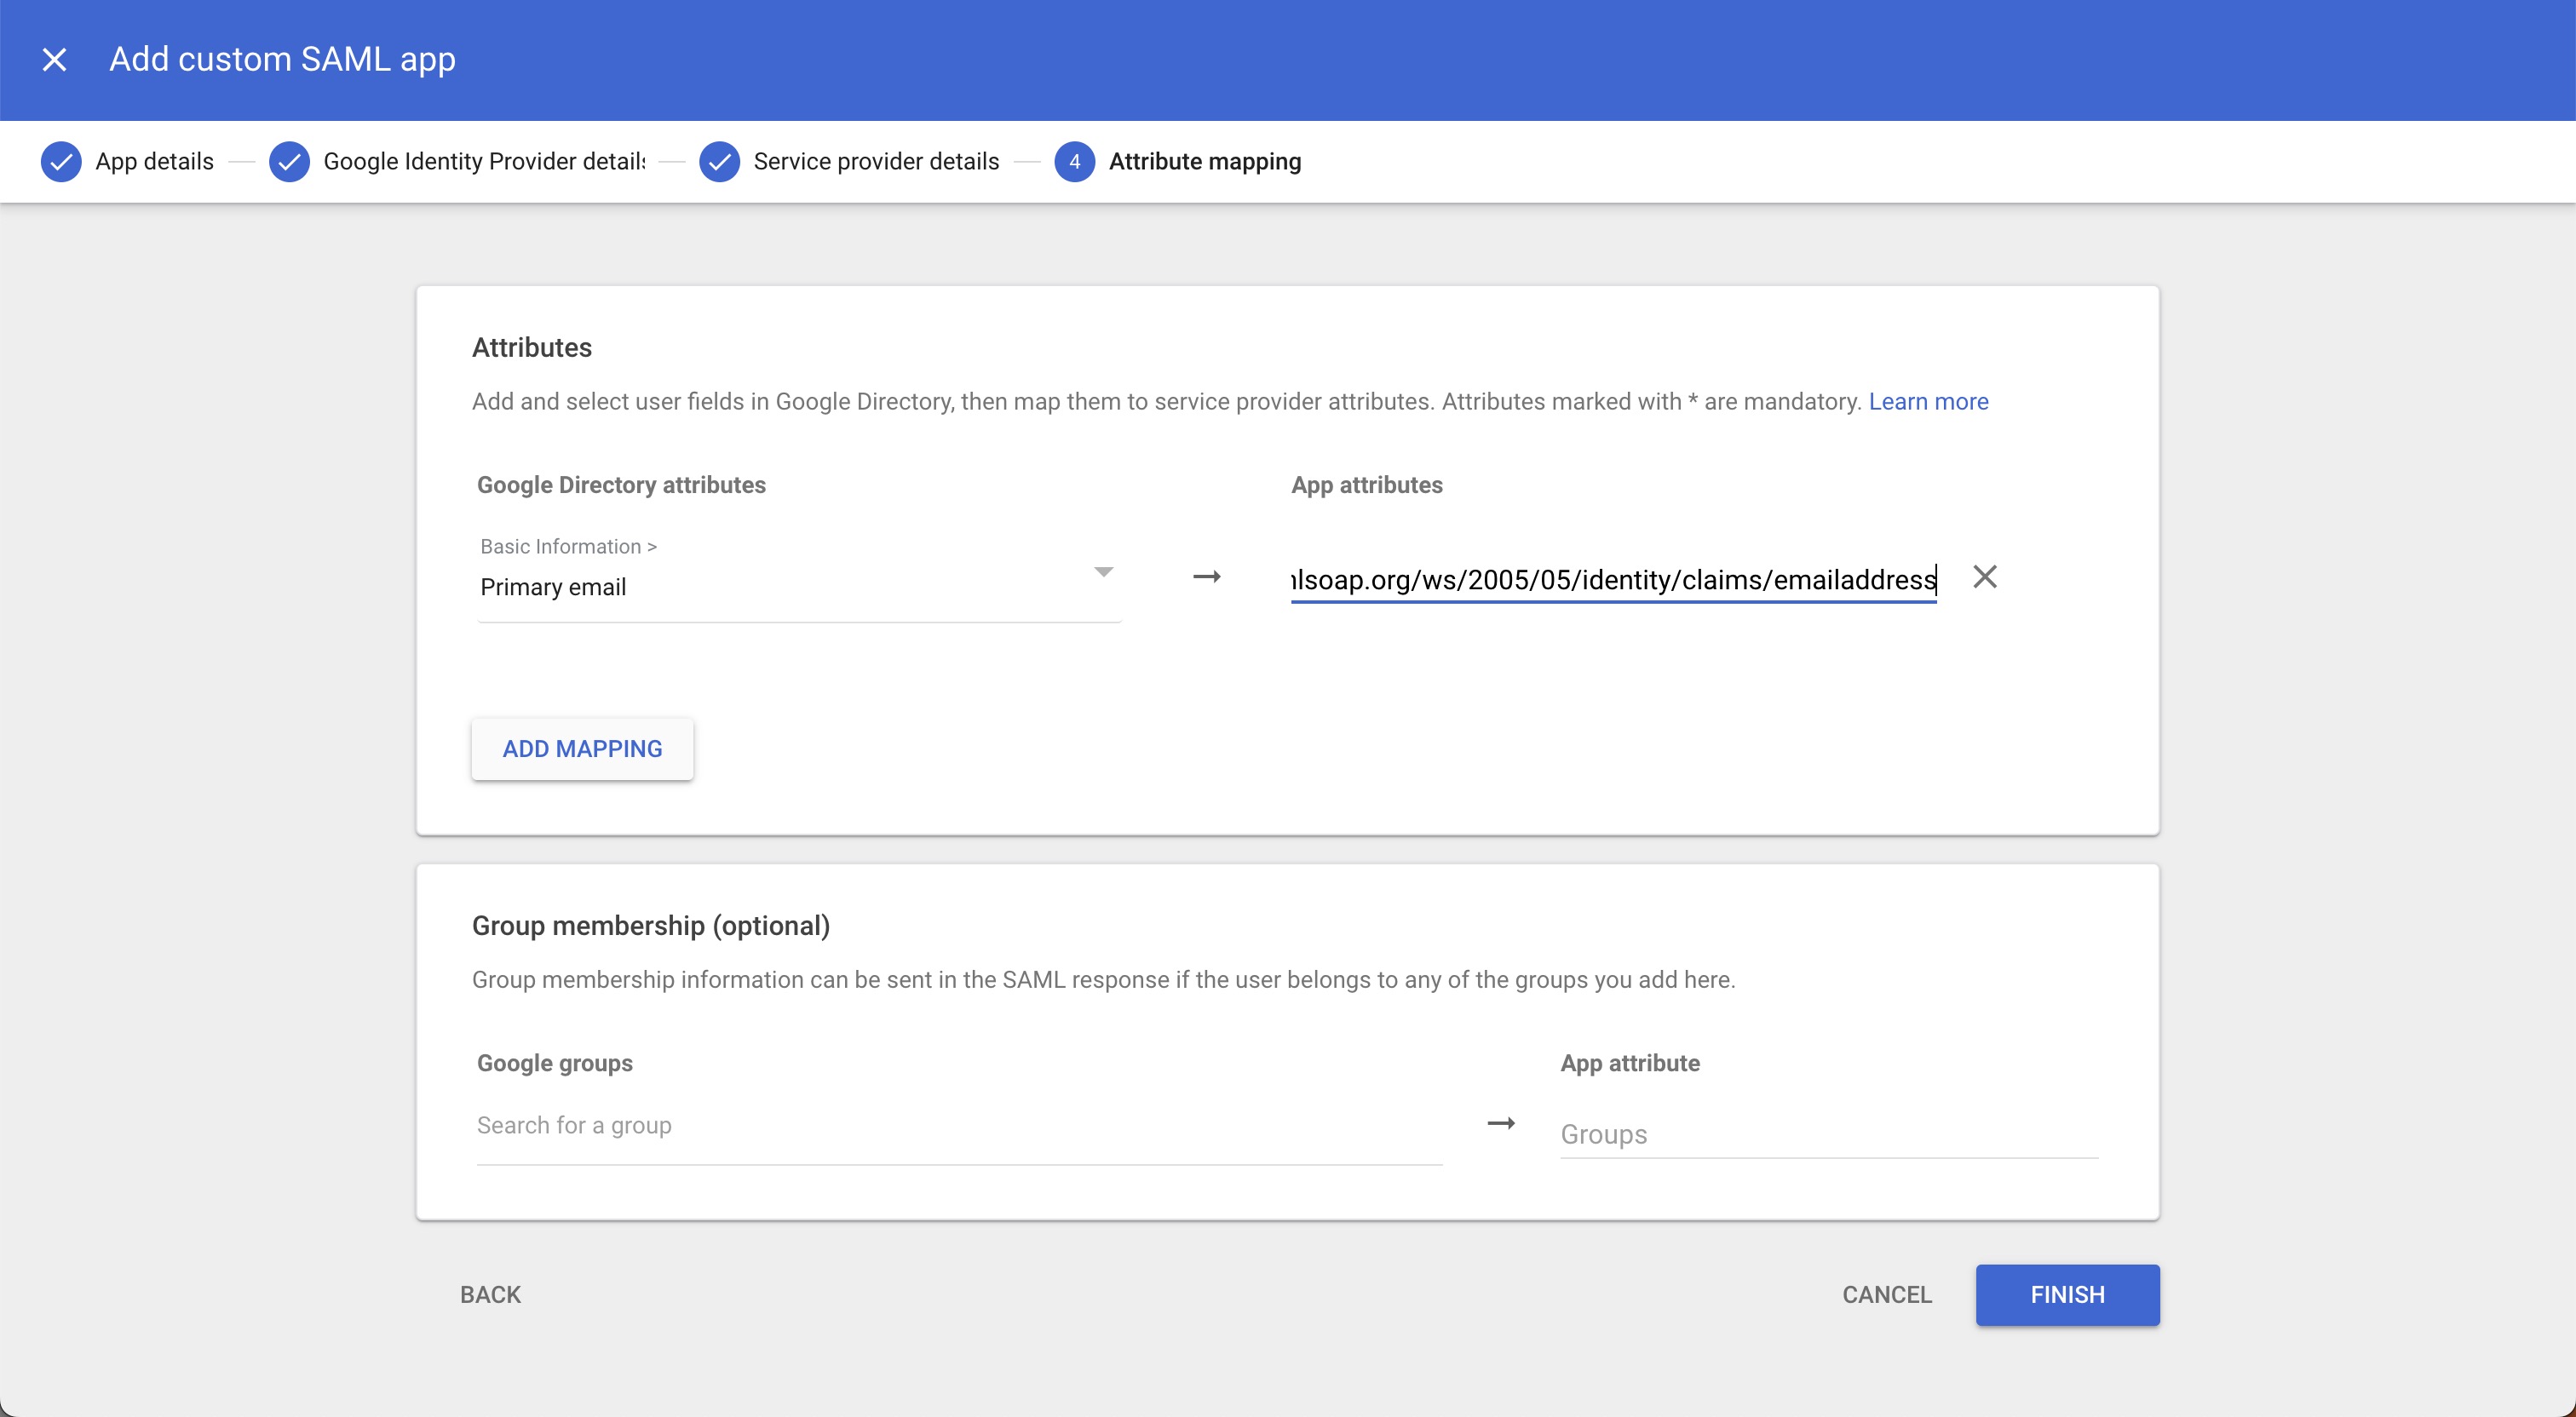
Under Google Directory attributes, select Primary email in the Google Directory attributes dropdown. Under App attributes input, enter http://schemas.xmlsoap.org/ws/2005/05/identity/claims/emailaddress Click Finish.
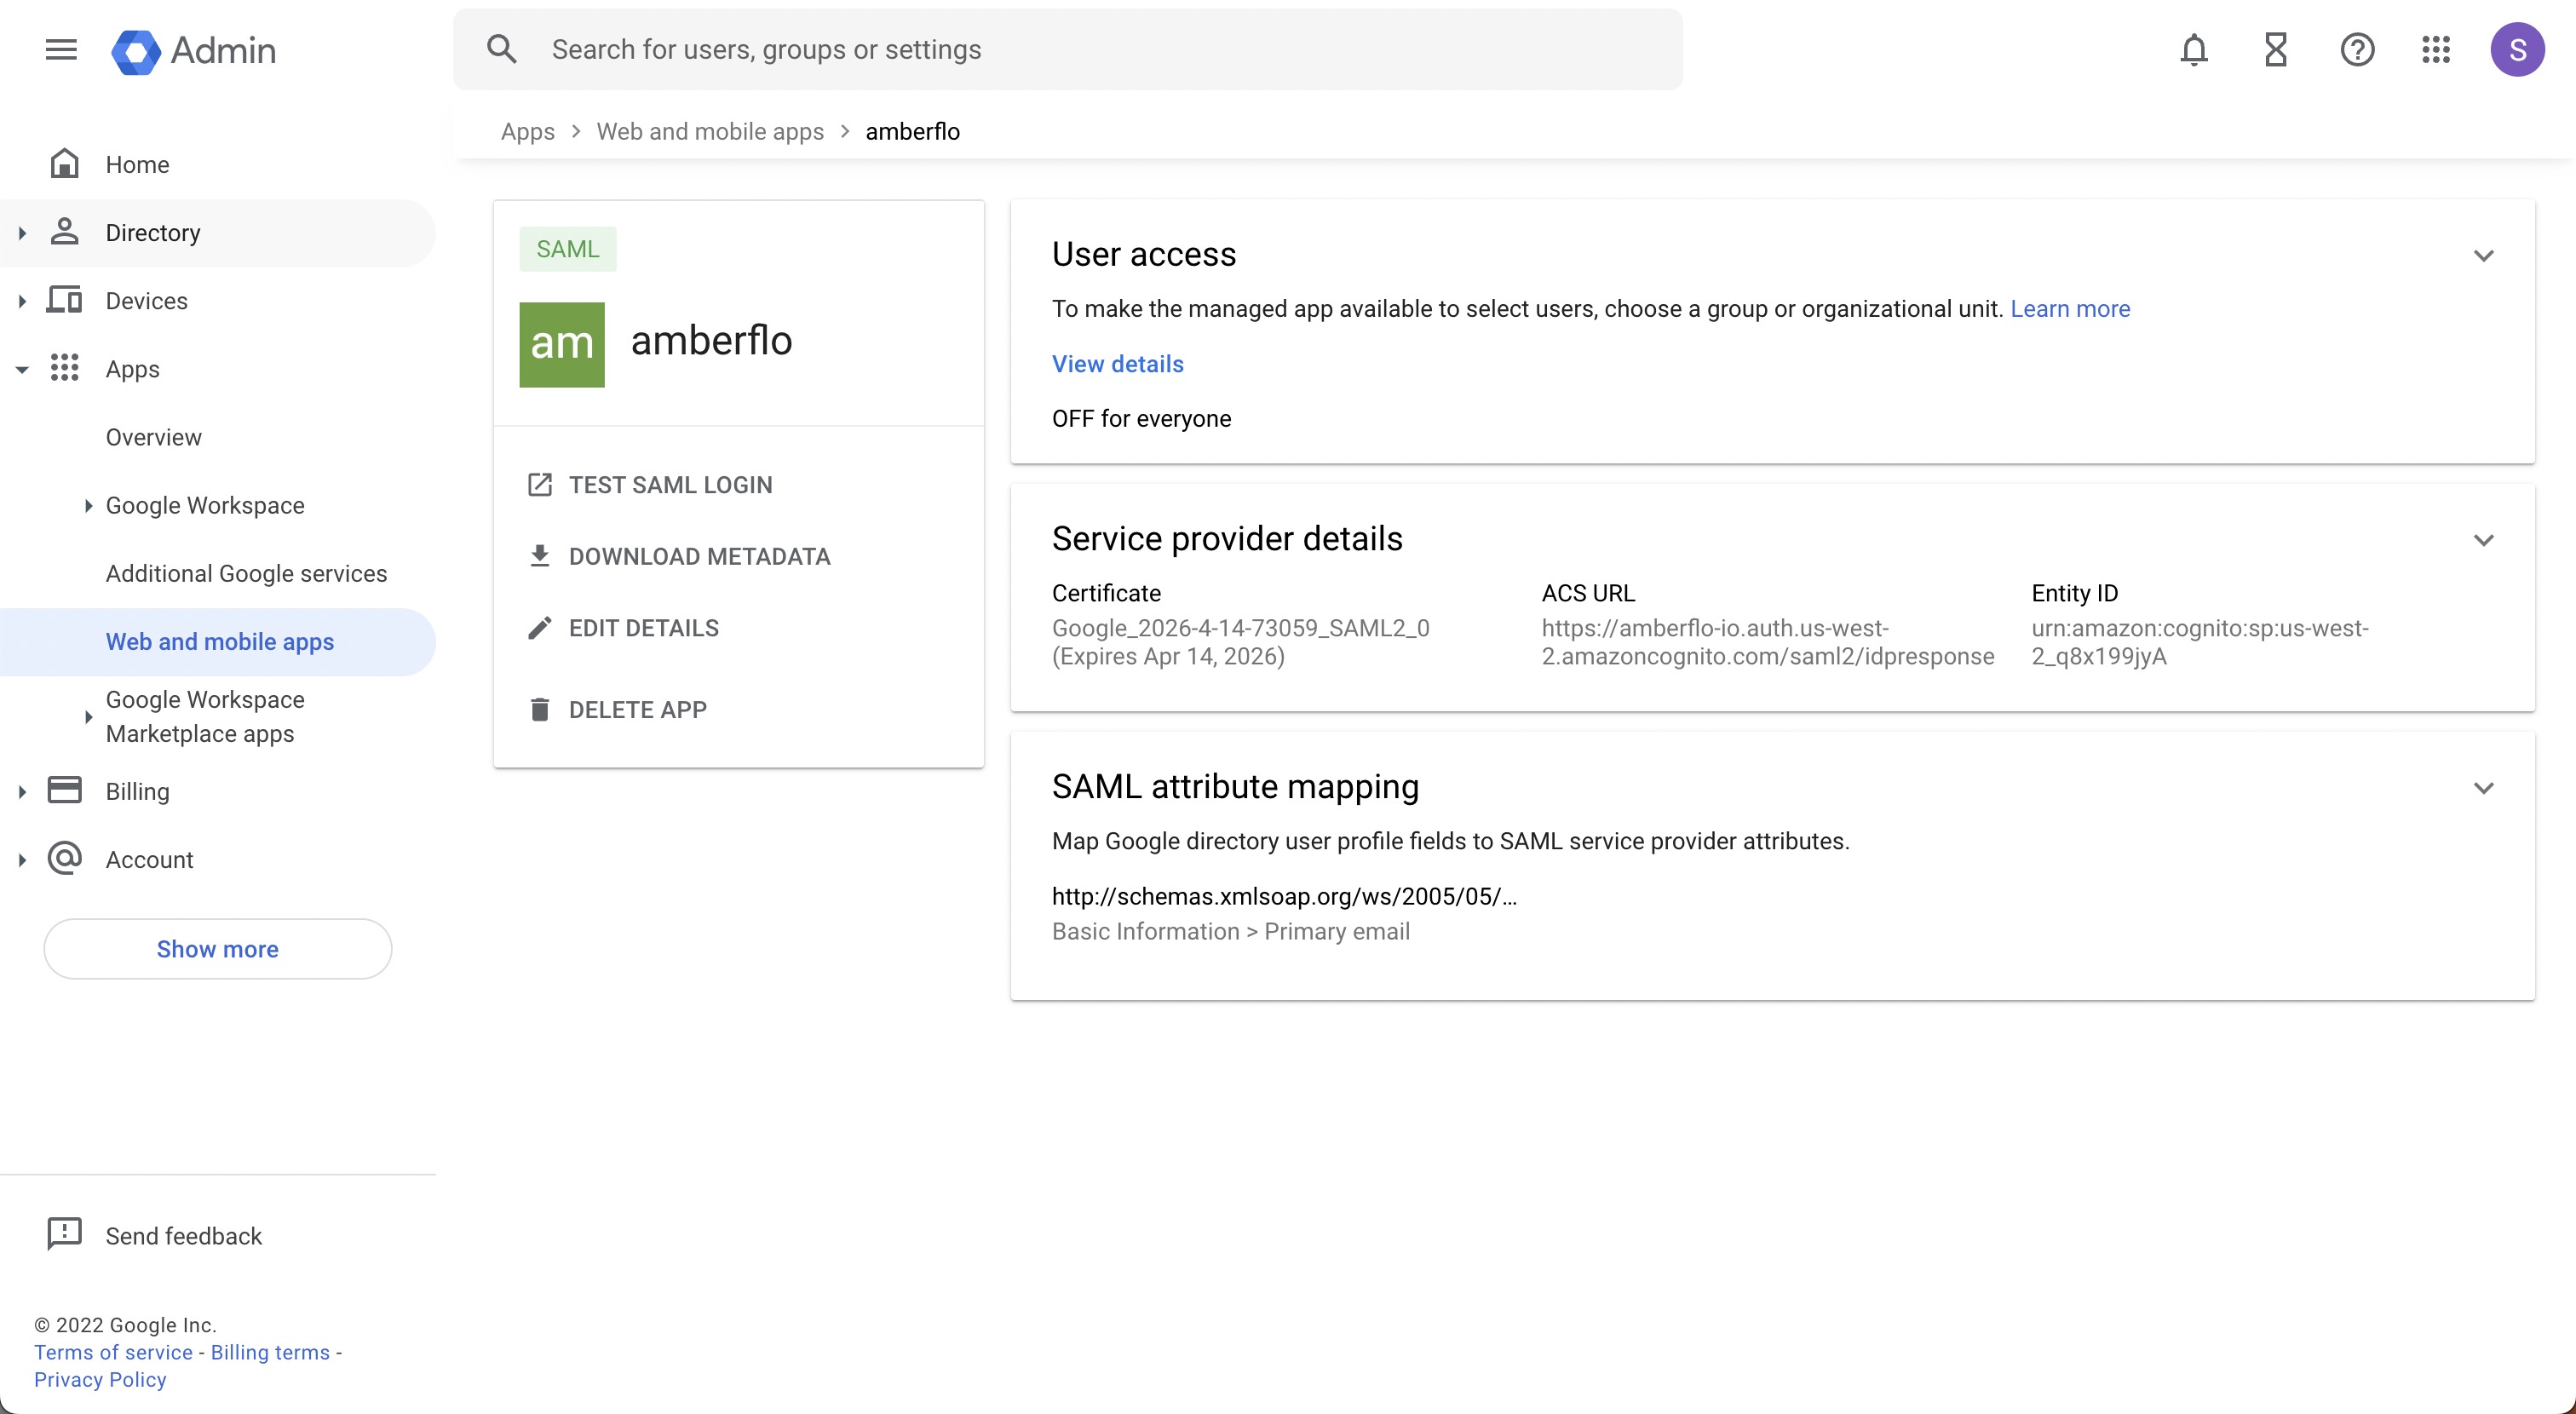
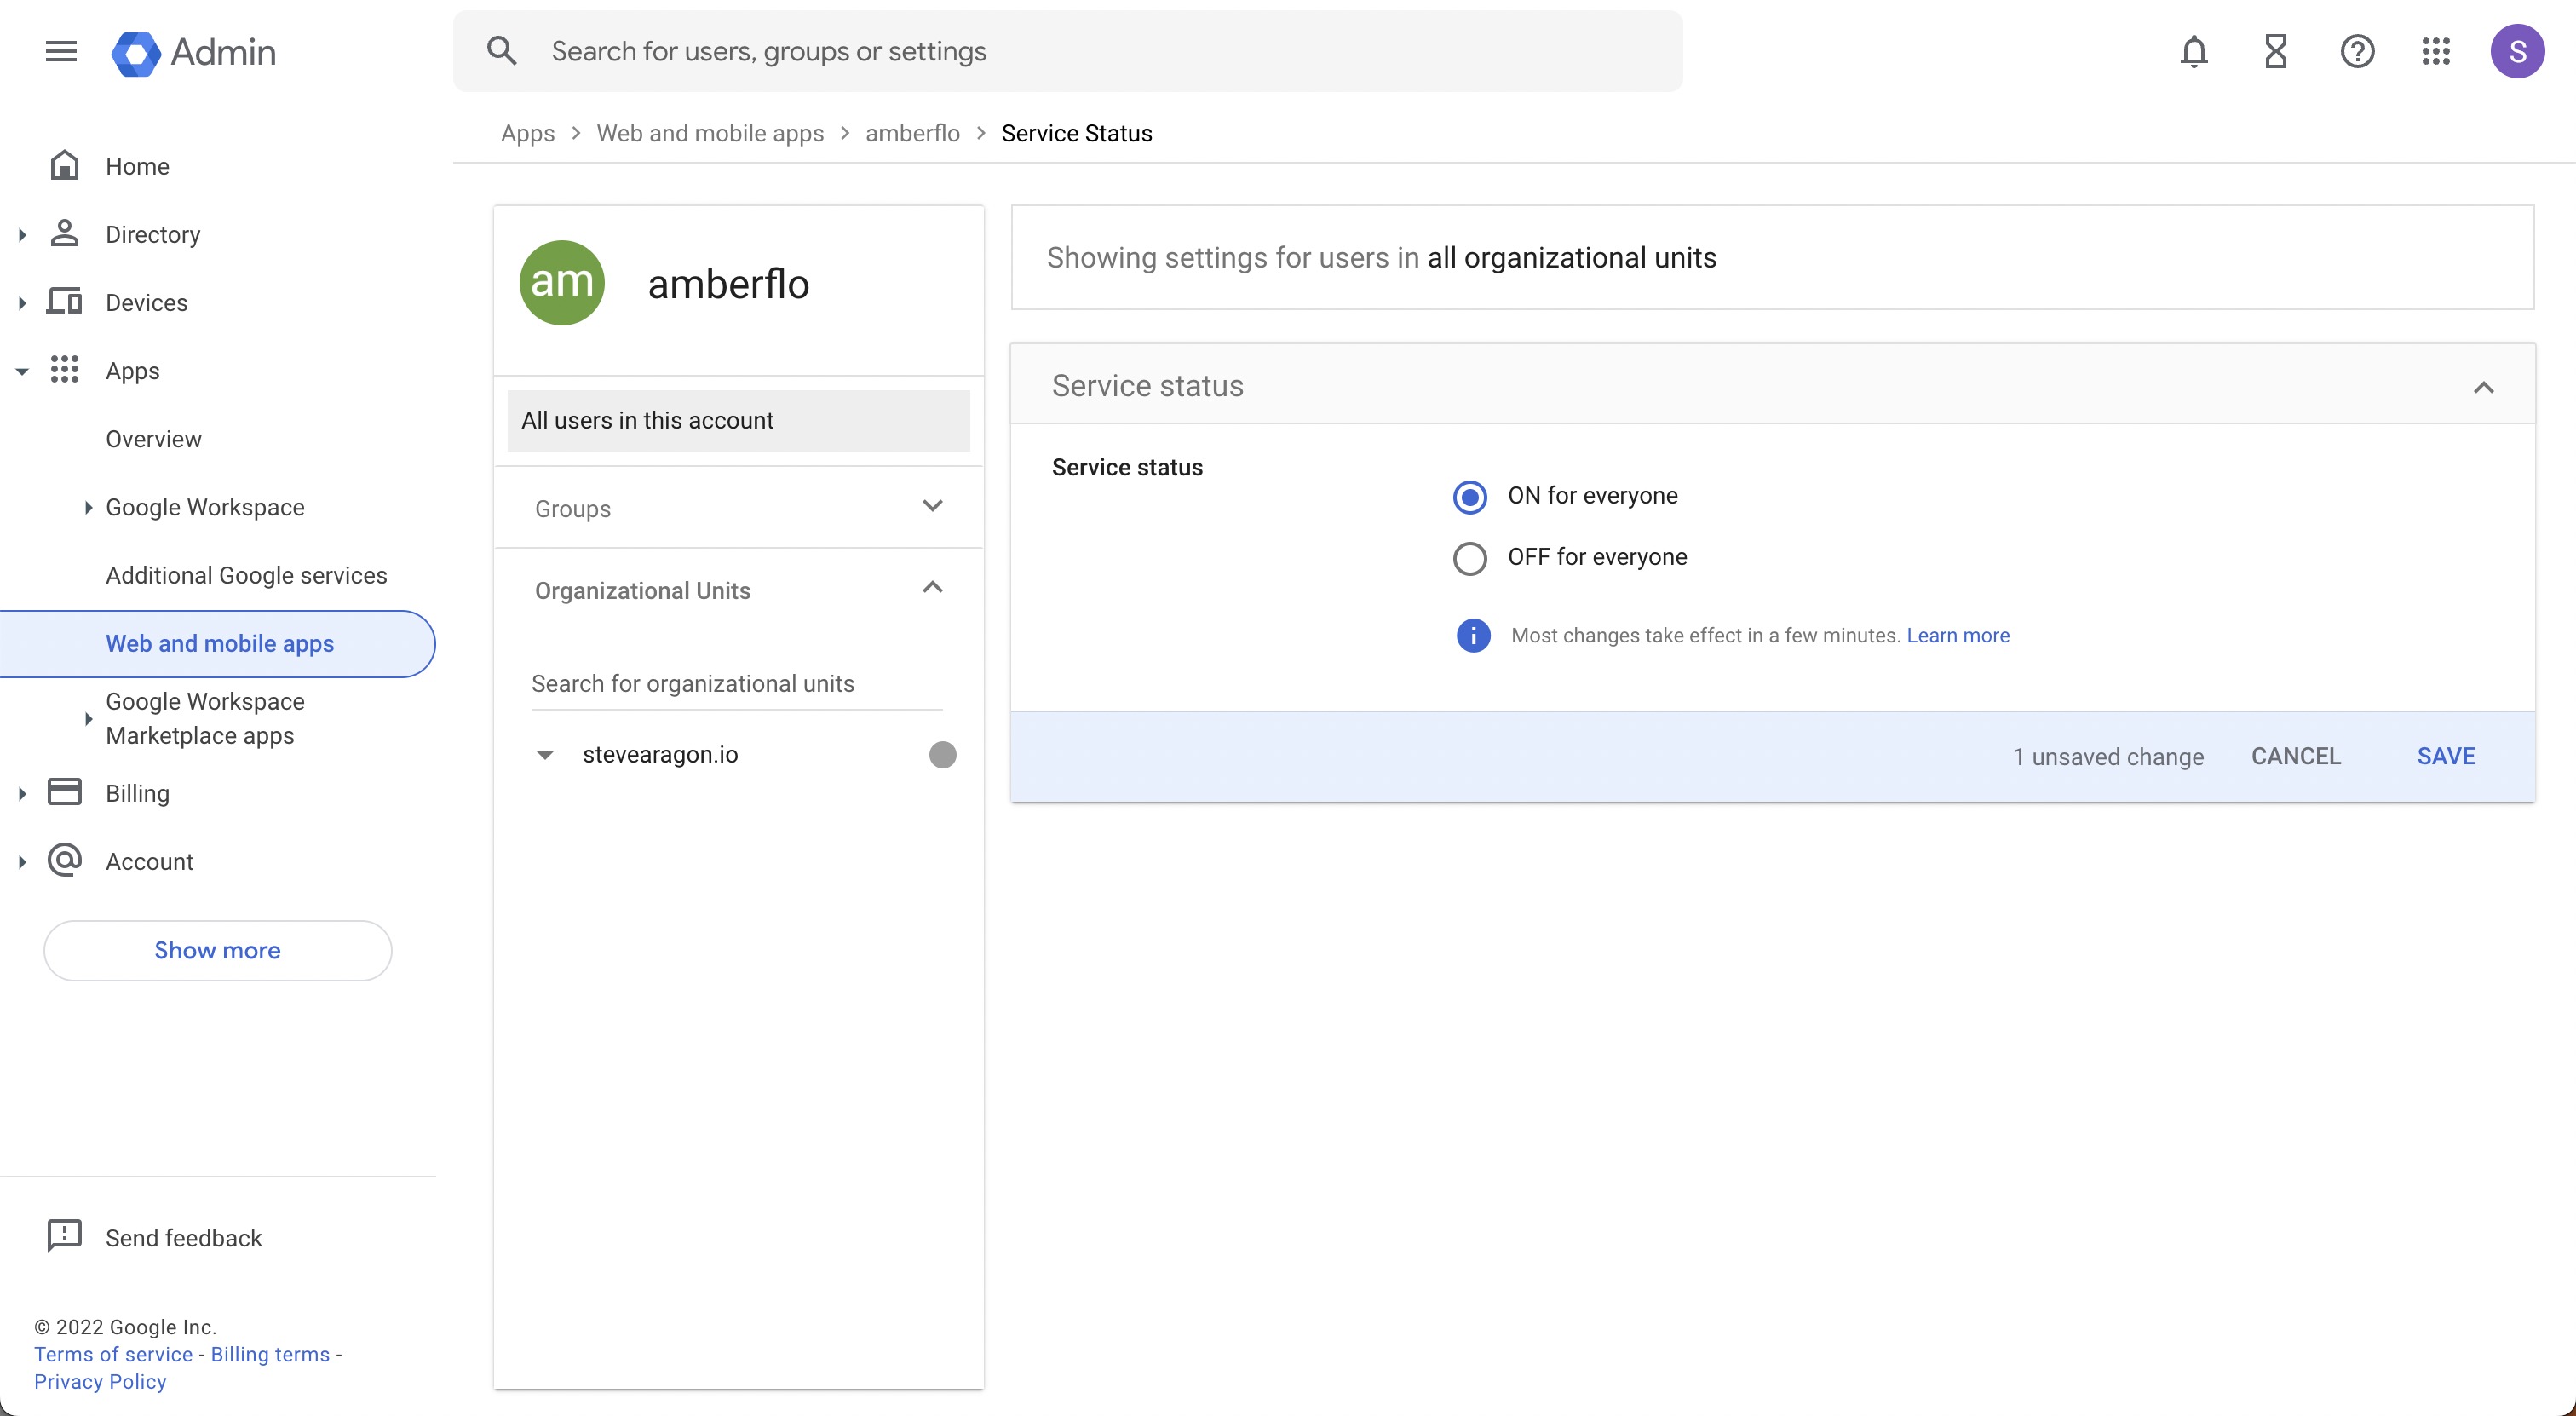
Back on your Google Workspace admin console, navigate to Apps > Web and mobile apps. Select your newly created SAML app. Click User access.
To turn on a service for everyone in your organization. Click On for everyone and then click Save.
After finishing this setup process, you will need to log out of your Google Workspace account and clear your cache. If you do not, you may see a not_a_saml_app error. After logging out of your account, if you still encounter this error, you may need to wait a few minutes for Google to associate your workspace with Amberflo.
That's it.
Troubleshooting Google Workspace SSO
Error: Invalid samlResponse or relayState from identity provider
This error occurs when attempting to initiate login from the Identity Provider (IdP) app. Amberflo does not support IdP-initiated sign-ins.
To resolve:
- Visit https://ui.amberflo.io
- Click Continue with SSO to log in through SSO
Error: app_not_configured_for_user
This happens when:
- You are signed into a Google account that is not configured for SSO with Amberflo
- Google automatically attempts to log in using that account without letting you choose
To resolve:
- Make sure you are signed into the correct Google account configured for Amberflo SSO
- Try logging in via an Incognito/Private browser window to choose the correct account